Electroforming is Art, Science and Alchemy all together. Electricity and Chemistry will encounter Geology, Botany, Sculpting, Metallurgy, Painting, Anatomy, Cryptozoology, Paleontology and more than you can think.
In this blog, I'll explain all the necessary steps to achieve the knowledge to practice this Beautiful Art.
This morning I found a bird foot on my roof that it was probably from a sparrow killed by Crows. Obviously, I decided to make a jewel with it, and it seems a nice Idea to make it look like it was grabbing a stone. A smoky quartz crystal was the best option for a Gothic Style.
Any animal parts need to be clean before any use. They contain bacteria and organic remains that can produce smell or infections. So the first thing to do is to submerge them in Hydrogen Peroxide. It will react with blood and any living microorganism. It will also soften the skin and the gristle, to make it easier to shape it on the crystal that we are going to work with. Leaving it overnight is gonna be enough.
I make it fit on the crystal and leave it another day, to let it get hard back again.
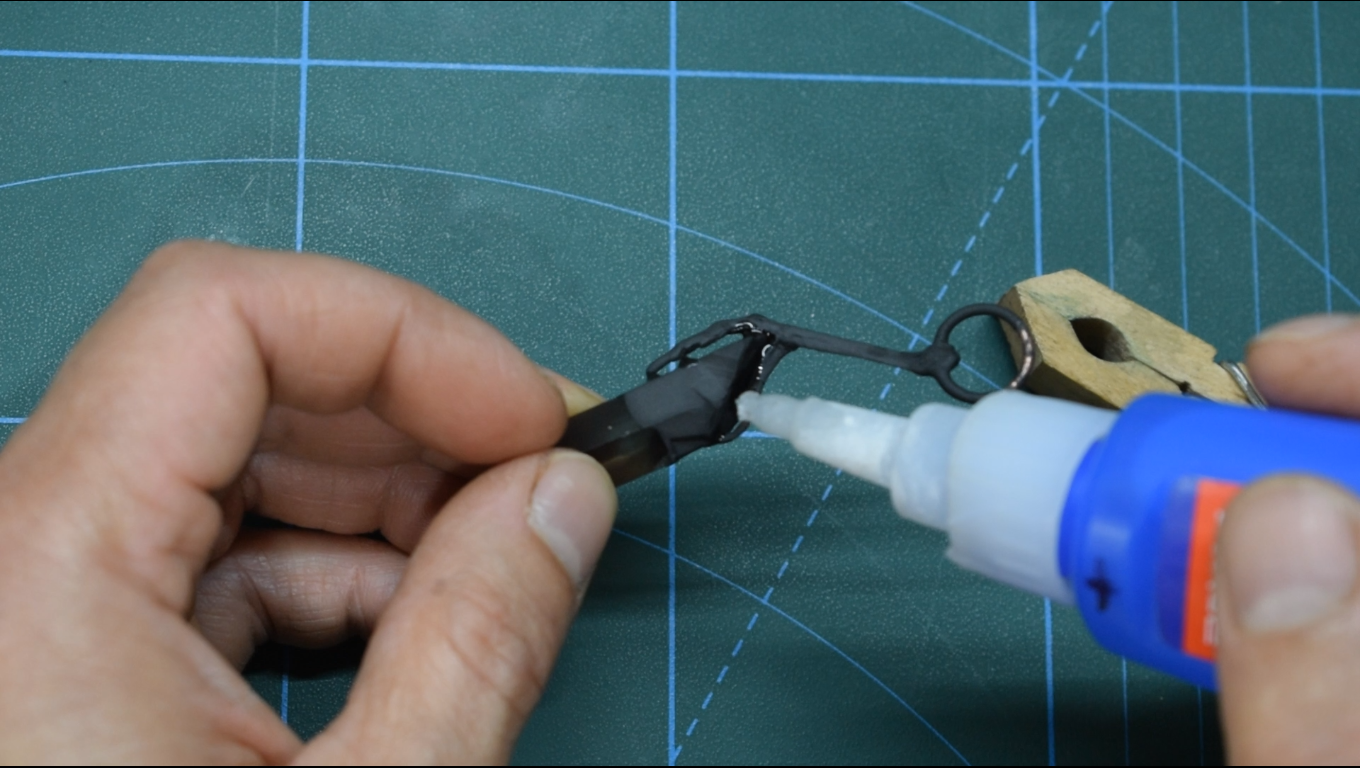
With CA glue, I add a jump-ring on it.
I decide to dip the pieces in conductive paint separately to be sure there were not missed spots.
And then I glued all together.
The glue on the graphite will prevent conduction, so I repaint all the glued spots again.
After letting it dries for an hour, I dip it in the electroforming bath.
Start with low current and gradually rise it to almost the maximum value possible.
In total, I spent 12 hours to complete this piece. It didn't take longer because I put it in the tank all alone.
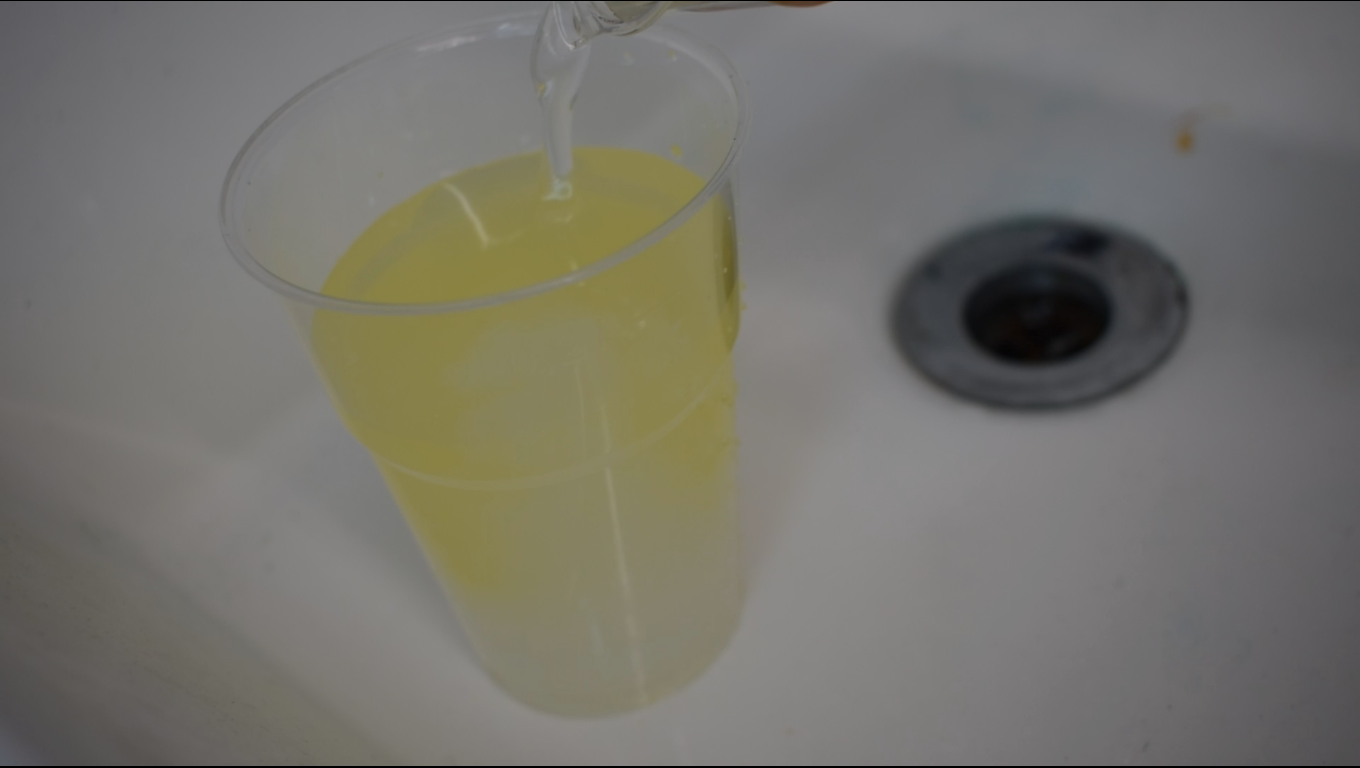
A wash with water to remove the residue of electroforming solution and ready to make patina.
Thirty seconds in a mild solution of liver of sulfur to make a dark rainbow effect and wash again.
With bleach, I neutralized the liver of sulfur, so it's safe to be flushed in the sink.
In this video, you are going to learn how to electroform with basic materials. Electroforming is a very simple process that anybody can do. It's versatile and can be applied to any form of art.
To start, you don't need to know chemistry or electrical engineering. With a few simple steps you can manage to create beautiful pieces of jewelry or basically any object covered with metal, in this case, copper.
⚠️⚠️⚠️ Some precautions must be taken with the Electroforming solution, it contains irritant substances. You only need to protect your eyes and open wound or fresh scars from splatters. It won't burn your skin, and it's safe if you touch it. Just wash your hands before any other living activity. ⚠️⚠️⚠️
Here all the supplies you need to start your new hobby:
Before we start to electroform our objects, we need to prepare them. I decided to make jewelry. A pair of earrings and a pendant.
I'm starting by making 2 jump rings. Using a pair of round nose pliers, I round up the jump rings on the thicker part of the pliers and cut them with nippers. Then, a straight piece of copper with the 1mm copper wire, and two hooks with the 0.6mm copper wire.
I cut the stems of my leaves and replace them with these new parts. The straight piece for the pendant and jumps ring for the earring. I glued all the parts together with CA glue and baking soda. Pouring baking soda on CA glue will make it cure instantly, and it's gonna create a strong bond.
The other 2 pieces are needed as hooks for the earrings.
Gluing hooks directly on a piece will prevent it from floating in the bath. Usually with jump rings and separated hooks they will come up. So you need to secure them by bending them a little.
All the surfaces that we wanna cover with copper needs to be covered with a conductive material. Therefore, we are going to cover them with conductive paint. Conductive paint is gonna “conduct” the electricity in all the non-conductive parts of our objects.
There are lots of different kind of conductive paint out there, water or solvent base with graphite, copper, or silver in it. In my case, I'm using a solvent base with graphite conductive paint that I made my self.
While I'm painting my objects I don't brush the paint on the leaf, I just lay it because I don't to leave strokes that will be replicate by the copper itself.
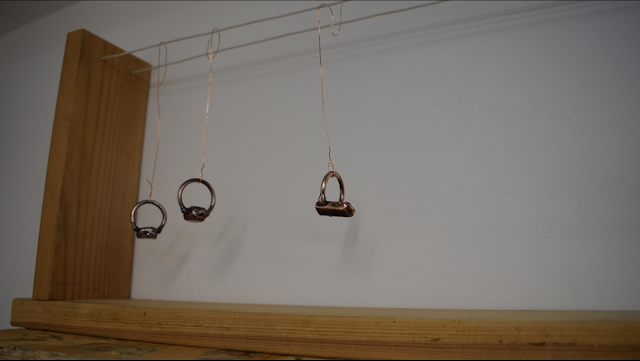
Graphite conductive paint needs to rest for at least an hour to get activated. If the paint is water base, it also needs longer, since water has longer evaporating time than solvent. So hang your pieces somewhere and wait.
To prepare our electroforming station, we start by filling the container with the copper electroforming solution.
Then we insert the copper plumbing pipe inside and secure it with the red alligator clip of our cable. This is going to be our anode.
On the copper rod, we hang our pieces and connect the black alligator clip on it, and here we have the cathode.
The anode is the pole that will attract electrons and will give back copper ions. The cathode is the pole that will give electrons and attract copper ions on the surface of our pieces.
After I submerged my leaves, I noticed that bubbles formed on the graphite. With a brush, I give it the necessary strokes with the same liquid to break the surface tension and avoid those bubbles to form again.
Different conductive paints act in different ways, so this step may not be necessary.
Secure everything with cloth pins and get ready to start the Power Supply.
But before we operate it, we need to set it up.
With my Power Supply, I usually turn all the Amperes knobs UP and all the Voltage knobs down, and use only the “Fine Voltage” knob. We don't need lots of tension and current, so that's the best way to work. Be aware that some adjustable power supplies may work differently.
Now you can connect the cables and power it.
But how many amperes do I need to apply to my pieces?
The right current to apply is in between 0.01A and 0.1A by inches squares. It means that you need to calculate the entire surface of your objects (in inches squares) and multiply it by those numbers.
My leaves measures are 1"x 1"x 2 faces x 3 pieces = 6" = 0.06A/0.6A
For the first run, I go low and slow, so I start with 0.06A.
After 1 hour, I can check the result and see that some copper forms on the graphite.
After 3 hours, I have a little more copper.
After 6 hours, it requires a little more to get completely covered.
After 8 hours I can see that is completely covered, then I go to the next step.
My pieces are covered with a thin layer of copper now, so I need to make it thicker by speeding up the process.
I can raise the amps now to a higher value, but I'm not going to the top. It would be a risk and the objects can get “burned”. I decided to go with 0.4A. And when I checked them…
After a total of 17 hours, I noticed that on my pieces it grows some copper texture. This happened for 2 reasons, a) the amperes were a little bit higher and, b) I left it for too long at this value. Learn from your mistakes. But maybe is not a mistake. This texture is the peculiarity of this art. Some people like it plain, some like it with character.
I then low the amperes to 0.2 and leave it go for a total of 36 hours.
As you can see from the picture, they are not pretty and also have more roughness on them. But they are electroformed, covered with enough amount of copper to make them sturdy.
They need to be wear as jewels, so in the second part of the tutorial I'm gonna show you how to finish them with advanced supplies. I will teach you how to make them shine with a few different techniques.
Watch this tutorial on my YouTube channel and don't forget to subscribe.
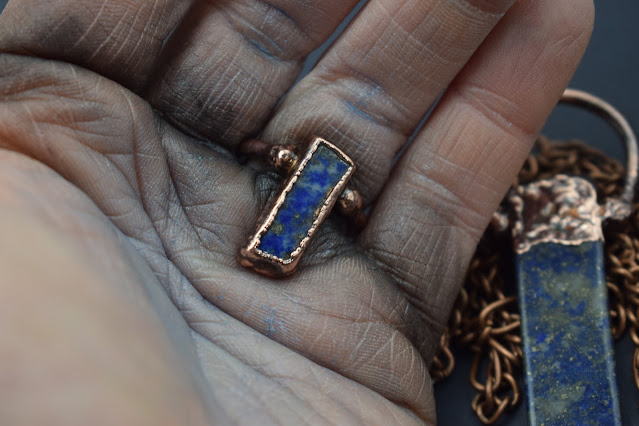
To make this ring with Lapis Lazuli a little bit special, I round up the ends of the loop with a torch. The flame and gravity take part in this easy project that every beginner can do.
I'm also gonna show a few more advises about stone preservation and power supply settings.
Starting by cutting a piece of copper wire a little longer than the length I need. Then I bent it to a horse shoes shape and set it on a copper pipe with the ends pointing downward.
With my torch, I heat the ends to melt them until two drops of liquid copper can be seeing.
Then I quench the piece in water and put it in pickling solution to clean fire scales.
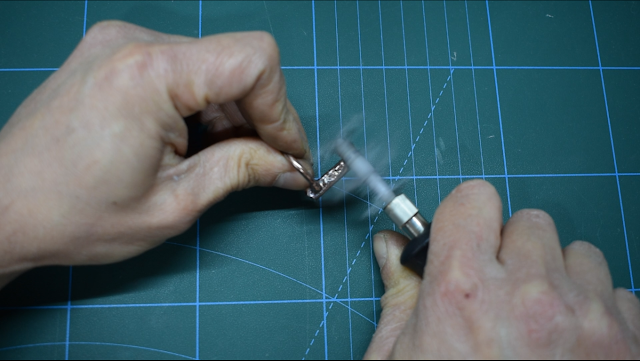
With a steel mandrel and a rubber hammer, I harden the ring a little to let it keep the final shape.
Using my DIY water dropper and the rotary tool with a diamond cutting wheel, I cut a piece of lapis lazuli slab that was too long for a ring.
To join the stone and the loop, I used CA glue. The loop was hard enough and precise to stand on the stone by itself.
I apply conductive paint to cover the stone. I'm not doing the usual stoke, I'm applying it coarsely to bring out texture. Conductive paint needs to dry for at least one hour.
With a wooden stick, I apply liquid latex on the top of the exposed stone to protect it. Lapis lazuli can be dissolved in the electroforming solution and being ruined. The Solution itself, reacting with the stone, can be also get ruined.
After the latex dries, I dip my piece in the electroforming tank. Right after the piece got submerge in the blue liquid, bubbles can form on top of the graphite paint because of surface tension. I give it a few strokes with a brush to break the tension and prevent more bubbles to form again.
When everything is secured with cloth pins, I start my power supply and set it to the low amperes range.
The range must be between 0.01A and 0.1A.
To set the right current, we need to multiply the surface of our pieces in inches square by this range.
I made a few more pieces and all the surface measured approximately 4 inches square.
I decide to proceed in 3 stages. Low stage for 2 hours at 0.04A, Medium stage for 8 hours at 0.20A and Hi stage for 14 hours at 0.40A.
When, after 24 hours, everything was finally ready, I removed all the pieces from the bath and wash them in distilled water.
I prepared a container with distilled water and a bit of liver of sulfur and dip all the pieces together for 10 minutes to get a brown patina.
Always remember to neutralize liver of sulfur before flush it in the drain. In this case I did it with bleach, but backing soda can be used too. Also, you can leave it evaporate on its own in a ventilated area. Liver of sulfurhas an intense smell produced by the evaporation of the sulfides, just like rotten eggs. Don't breathe it.
After that, I wash all pieces back in water and finally remove the latex coat to reveal the stone under it.
With a polishing pad for metals, I tried to clean some of the black patina by hands. It was a very tedious job, so I mount a split mandrel on my rotary tool and insert a piece of polishing pad. In less time, I was being able to reach all the gaps and crevices of the ring and bring back the shine.
To protect it from further oxidation, I dipped it in Zapon lack. It's a varnish specific for metal jewelry. Few seconds in it and then a little centrifugal motion to remove the excess.