The most wonderful time of the year is coming, Christmas is here! For the biggest event of all time, I couldn't be miss the opportunity to make a themed jewel. And the symbol that better represents winter holidays is the Christmas tree, so I made these tree shaped earring that can also be a tree ornament for the occasion.
Copper wire with red and green agate stones to make a simple yet gorgeous piece of jewelry/ornament for my viewers.
Enjoy this tutorial and video on YouTube and Merry Christmas!
Supply and Equipment:
- Copper Wire: https://amzn.to/3LwdFtM | https://ebay.to/3Iifrxj | https://s.click.aliexpress.com/e/_DnoNVNt
- Agate stones: https://amzn.to/3F9jfAZ | https://ebay.to/3XYdrCS | https://s.click.aliexpress.com/e/_DmyvgeP
- Wrap n tap pliers https://amzn.to/3DxT9YM | https://ebay.to/3N4yMFJ | https://s.click.aliexpress.com/e/_Dli4ZKL
- Nippers: https://amzn.to/38p5eST | https://ebay.to/3BQzX62 | https://s.click.aliexpress.com/e/_DeO2saR
- Files: https://amzn.to/3h57rYb | https://ebay.to/3vrtVY6 | https://s.click.aliexpress.com/e/_DEMqZA3
- Ball peen Hammer: https://amzn.to/3AXbED6 | https://ebay.to/3JXCk9M | https://s.click.aliexpress.com/e/_DnkcHQ3
- Anvil: https://amzn.to/3AW8DTj | https://ebay.to/35nXsqR | https://s.click.aliexpress.com/e/_DnBkfPz
- Rubber Hammer: https://amzn.to/3GmsgoH | https://ebay.to/353QAzf | https://s.click.aliexpress.com/e/_DCCltLV
- Flat nose pliers https://amzn.to/3TMCKoy | https://ebay.to/36yXkVZ | https://s.click.aliexpress.com/e/_DkFTs03
- Copper tape: https://amzn.to/3G08HpO | https://ebay.to/3UJTAoB | https://s.click.aliexpress.com/e/_DChOu3p
- Burnishing tool: https://amzn.to/3HcedGu | https://ebay.to/3Ha5d4q | https://s.click.aliexpress.com/e/_Dks2lur
- Lead free Tin solder: https://amzn.to/3fMONno | https://ebay.to/3Tm1iEn | https://s.click.aliexpress.com/e/_DCgJSQJ
- Solder iron: https://amzn.to/3hoRRGL | https://ebay.to/3tfzM0q | https://s.click.aliexpress.com/e/_DecgxCf
- Clear flux: https://amzn.to/3iEidFb | https://ebay.to/3BbWKtU | https://s.click.aliexpress.com/e/_DlANvCP
- The complete equipment and supplies for electroforming: https://kit.co/cuforming/electroforming-advanced-kit
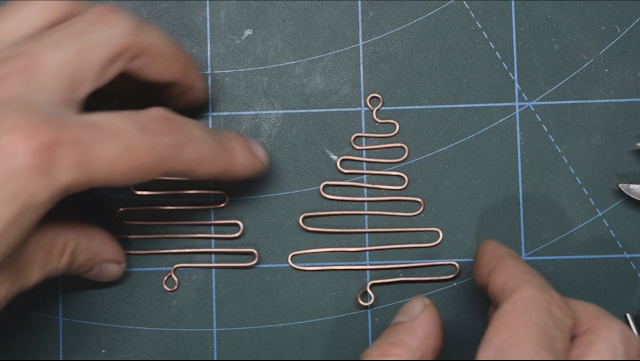
To make the tree shape, I use my wrap n tap pliers. I start by making the bail with copper wire and one by one I alternate straight parallel line one bigger than the previous resembling such as a serpentine and end it with another bail.
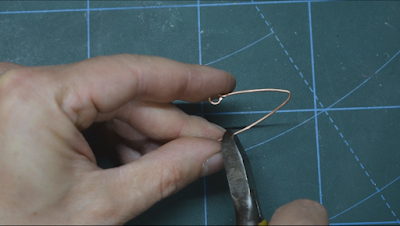
For the hook I also start with a bail on a piece of wire and with my fingers I made I round shape like a half circle. With my flat nose pliers, I made I sharp corner to close the hook. Cut to the right size and file the ends with my small needle file.
I then flat the corner on my anvil to give it strength, and then I attached them to the trees.
I choose red and green agate stones that are the colors of Christmas. These agates don't have holes, and definitely I don't wanna pierce them. That's where electroforming start to play in this project.
I use copper tape, which is conductive, to wrap all my stones on the narrow side to leave the face visible from the front of the jewel.
With a steel rod, I burnished all the copper tape's wrinkles that didn't got glued with just my finger pressure. Pushing the copper tape on the stone will make it be flat and there won't be any issues while electroforming.
Now we can join all jump rings to connect each part. I wanna set red stones on top and the green ones on the bottom, so I'm gonna weld two bails on the red ones and only one on the greens.
Using my solder iron and just a small dot of tin solder, I attached them one after another. To help tin to stick on copper, I use flux.
In one of my old videos, I made crimp end caps, and I soldered them with the same technique. In that video I used a waxy flux that was very dirty with lots of residues and after the job I had to wash all pieces in acetone and put them to boil in hot water.
This time I use a clear no residues flux that doesn't need any other treatment after the soldering process so that my pieces are ready for the electroforming solution bath.
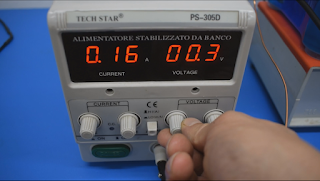
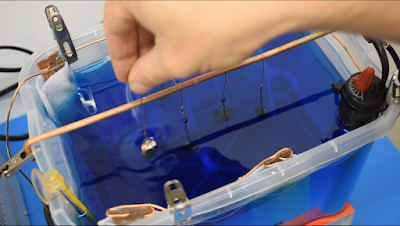
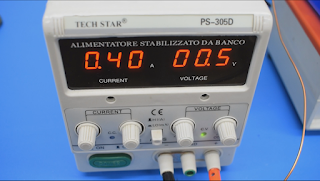
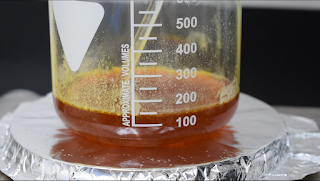
Since I didn't use any conductive paint therefore all the parts that need to be electroformed are already metal, therefore in the tank, they will stay less than usual. I set my power supply at low current during the afternoon, and I set it on medium/high in the evening before I go to sleep.
The next morning everything was bright and shine, so I removed them from the bath. But I was going to mount them on the tree part and I noticed that the wire's copper wasn't as bright as the one on the stones, so I decided to put those tree with the hooks attached in the tank for few hours to mach the stone's brightness.
I finally set myself in mounting mode and join everything together. The hook on top, then the tree, the red stone and on the bottom the green one.
I couldn't wait to make a photo shoot, so I spent the rest of the afternoon preparing and decorate my Christmas tree.
And there you go, my Christmas Tree Earrings Ornaments.
Please watch the YouTube Video, Like and Subscribe.
Thank you all of you and Merry Christmas, CuForming!


