The color is blue!
For this project, I used a ceramic piece that I've found in the field.
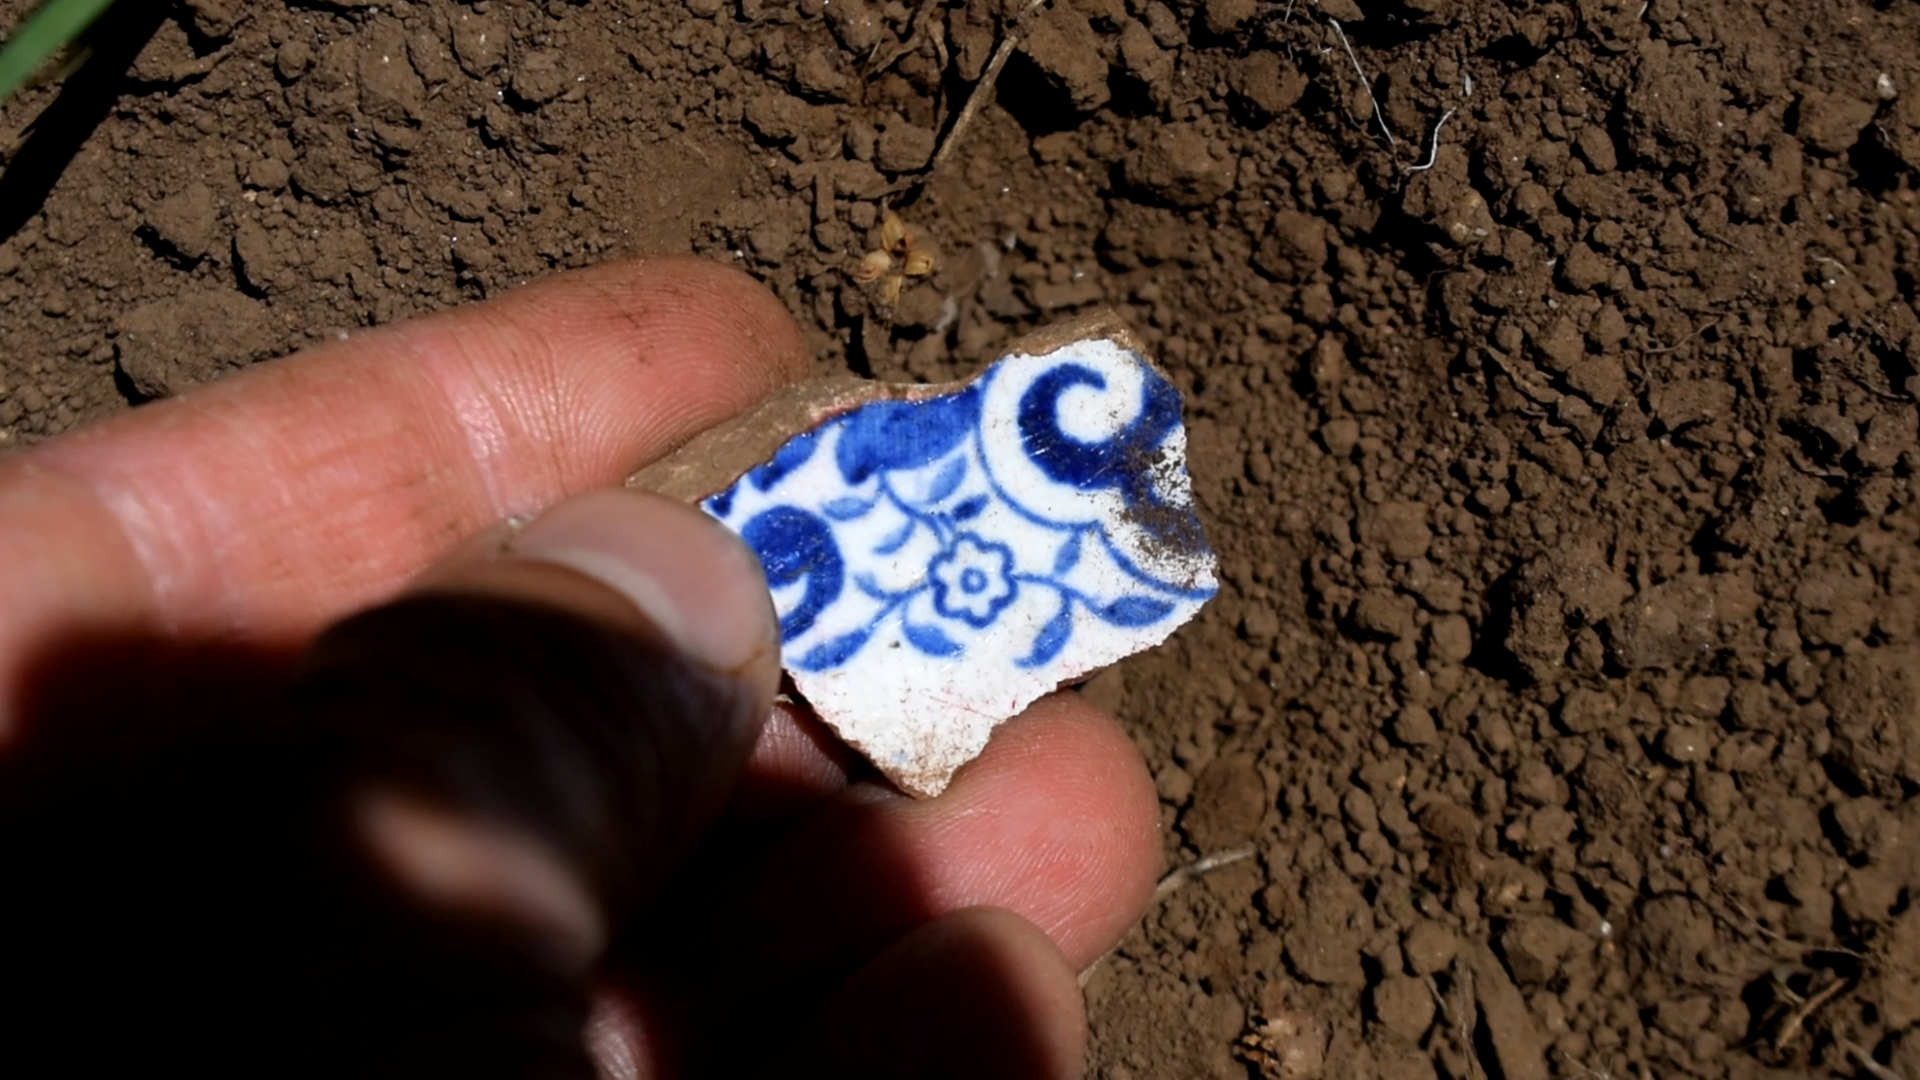
I'm not a mudlarker, but everyone who find a treasure won't miss the opportunity to grab it.
Instantly, when I saw that little blue sunk into the soil, I knew what it was. What I didn't know it was that I was going to collect a flower that it wasn't from a plant.
I believe that everything can be electroformed, and I did.
This piece of blue ceramic must be from an old plate. I don't live in a historical place, so I think it could be from the sixties.
The blue color prompted me to experimenting more with patinas. In my latest video, I tested ammonia on copper, and it was a fail. But the advice of one of my subscribers was enlightening.

It all came out in/(of the) blue.
Supplies:
- Piece of ceramic
- Copper sheet
- E6000 glue
- Apoxie Sculpt
- Conductive Paint
- Distilled water
- Vinegar
- Ammonia
- Table Salt (NaCl)
- Rotary Tool
- Diamond cutting wheel
- Sheet metal shears
- Ball peen Hammer
- Texturing Hammer
- Rubber Hammer
- Drill press
- 3 mm drill bit
- Silicon brush
- Balled tool
- Brush
- The entire electroforming equipment
- Sealed container
- a piece of plastic net
- tooth brush
- Rotary bristle brush 2000 grit
With my rotary and a diamond cutting wheel, I shaped the piece of ceramic like a drop. It helped me my DIY water dropper to avoid all the dust from the ceramic to surround my lab and cause health problems for may respiratory system.


Then I cut a piece of copper sheet a little bigger than the ceramic piece with shears for metal sheet.

I used three hammers to flat and texture it.
To flat it down and remove the sharp edge, I used a ball peen hammer. For the texture, my DIY hammer with small squares was my first choice. And with the rubber hammer I made straightened everything.


The hole for the chain was made with a 3 mm drill bit.

To join the ceramic and the copper together, I used the E6000 glue. It's the perfect choice for this kind of connection between different materials. It takes 24 hours to cure, but the time is worth it.

Now in between the two parts there is a gap that I'm gonna fill with Apoxie Sculpt. This material comes with A and B parts that need to be mixed together in equal parts. It's mandatory to use gloves while mixing it because the two parts separated are toxic. But after completely knead, it's safe to the touch.

I made little sausages and wrapped them around the border. A silicon brush helped me to shove them to the hollow spots. With a balled tool, I've closed all opened fringes.

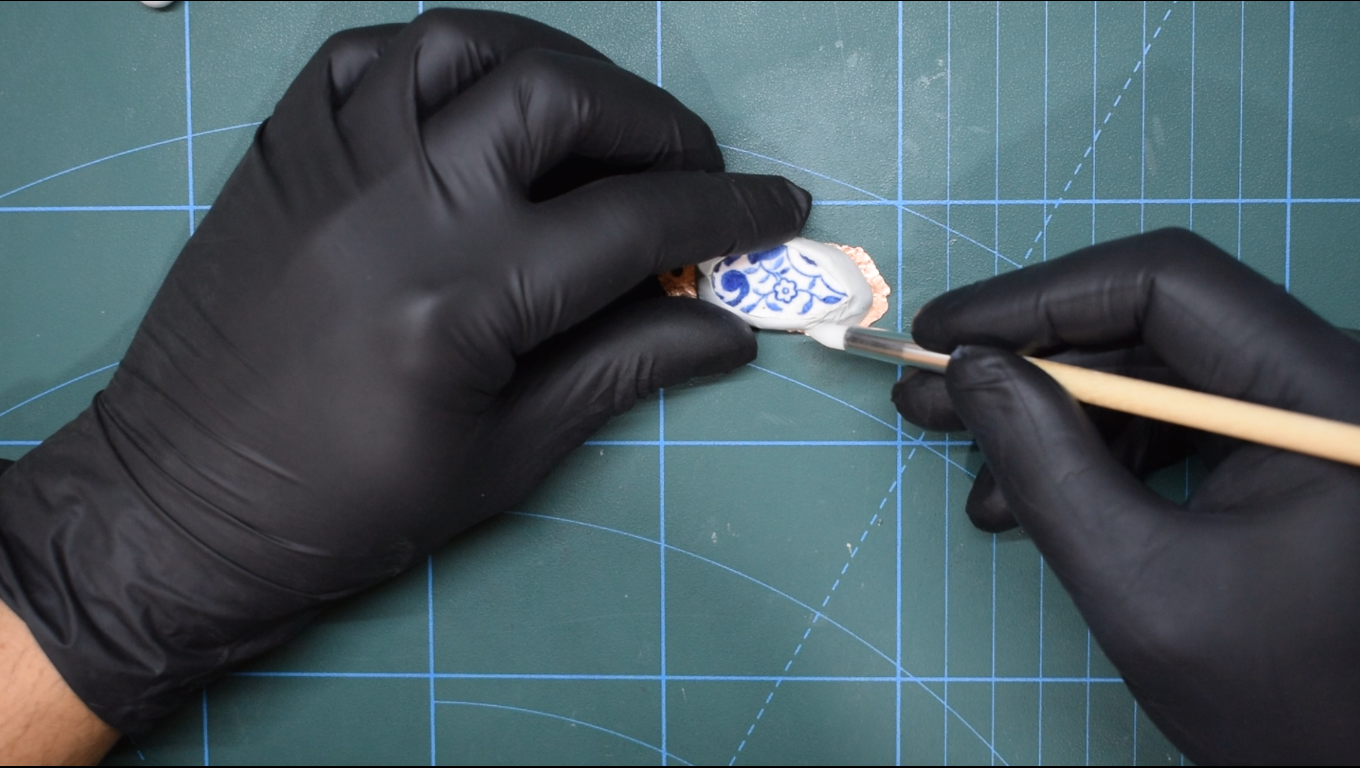

With the same bolt of my DIY texturing hammer, I replicate the same design of the copper sheet onto the apoxie.

When I was sure it was completely dry and hard, I start to cover every non-conductive part with conductive paint. I applied two coats, 30 seconds, one from each other. This conductive paint dries really fast. Anyway, I left it an hour to rest in order to let the graphite activate and become more conductive.

It's now time for the real process of electroforming.
I dipped it in to the tank and set my power supply to the minimum current, but after an hour I realized that it wasn't doing a thing and I had to lift the current up a little.


I left it on its own for 12 hours to get ready. I thought it was covered in copper very well, but I noticed a little spot that was still black from the conductive paint. Sometimes you need to pay more care when coating your pieces with graphite. I repainted the missed patch and dipped it in for 2 more hours.
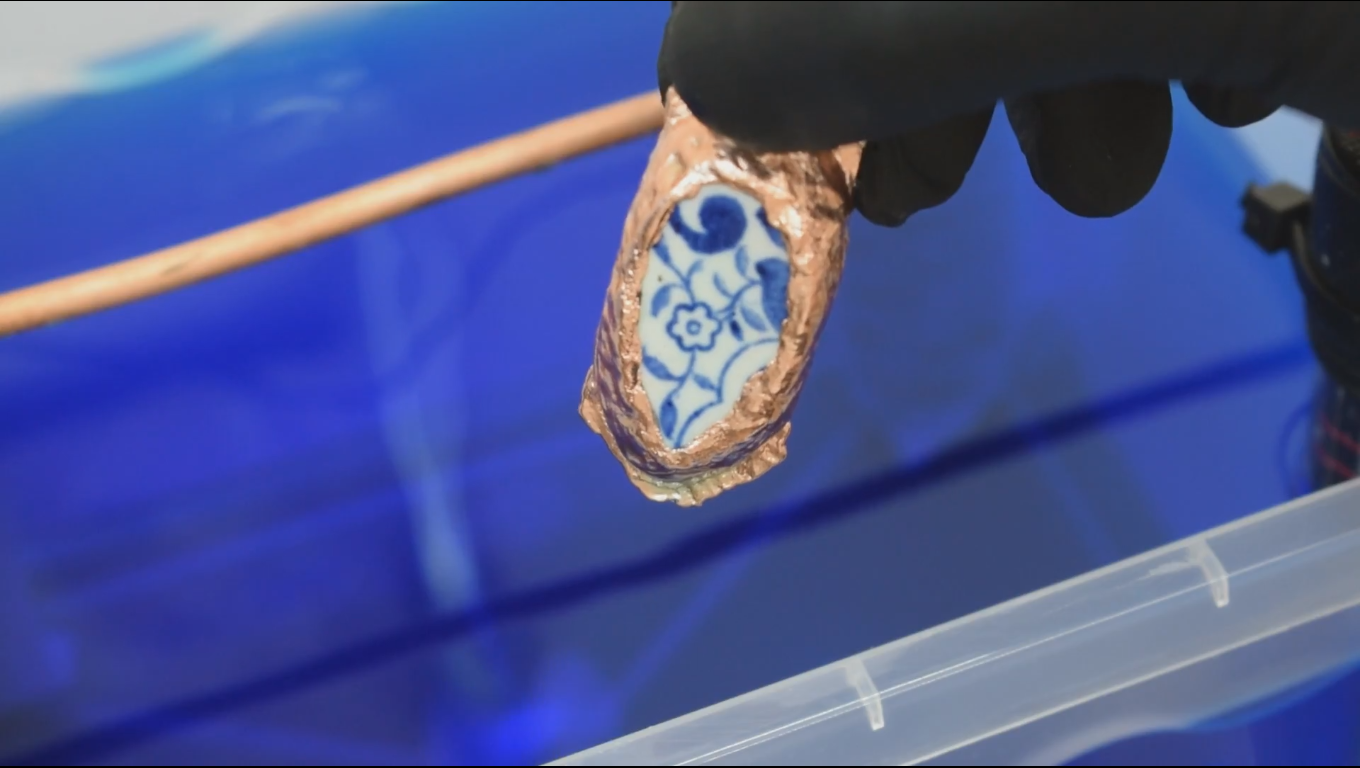

I washed it with distilled water, and It was finally ready for the next step.

For the patina, the process is simple. First you need to spray or brush on the copper some white vinegar and sprinkle on it some table salt. At first, I used coarse salt, but after a while I added some fine one.


To prepare the fumes chamber, you need a sealed container with some ammonia on the bottom and something that can keep the piece up. I used a piece of plastic net.


Now you just leave it inside, all sealed up, and wait.

5 hours later I took it out, and it was, in my opinion, very cool. When it got dry, it was great. It needs to be clean, though. The oxide is crumbly. With a toothbrush, I removed all the loosing powder.


To make it shines I gave it a very quick sanding with Rotary bristle brush 2000 grit.

I think the patina came out great, and I hope you enjoyed this project as well as I did.

Please check the video on YouTube and don't forget to subscribe.
Thank you all by CuForming!!!


