Monday, January 31, 2022

DIY water tank dropper for rotary tool


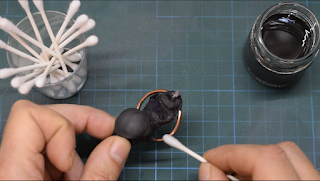
 With electroforming, I use a lot of gemstones. I buy them already cut and polished or rough. Sometimes they need to be adapted to the project that I'm doing and, especially, the rough ones, need to be cut.

Cutting stones is relatively easy, but inconvenient because of all the dust they produce during the process.

Breathing silica dust or other kind of mineral's is not good for your health. Using a mask could be a solution, but the result, in the long-term, will be a lab cover with a layer of dust even if you clean every day, and you don't want it in your electroforming bath.

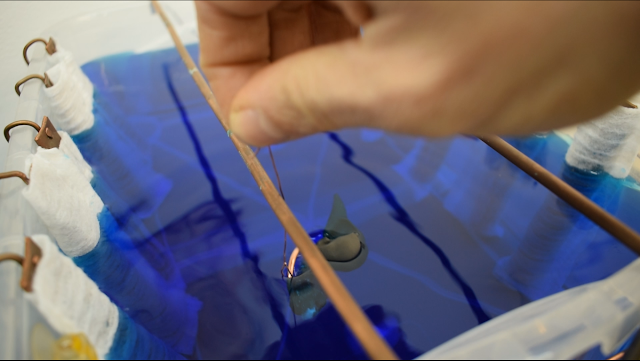
The best solution that every gemstone worker knows is WATER.

Water will prevent all the dust from flying everywhere, but I don't have all the machinery to work with stones, so I needed to do something cheap and fast.

Since I already have a rotary tool with diamond discs, I decide to do some adaptation to it.

 Tools I used in this project:

 and materials:

I recycled a plastic bottle as a container. The bottle needs to be large enough to make room for the rotary tool.


I marked the design I needed with a marker and then cut with scissors. I left 5 cm on the bottom to hold the water, and I kept the handle to hold the hose that comes from the pump.


With the cone drill bit, I made a 1.8 cm hole for the rotary tool to pass through.

At first, I drill the hole on one side, but the next day I change my mind and make the hole a bit bigger (2 cm) on the back. In this way, I didn't have to hold the rotary tool with my hand and there was less splashing water. I covered the previous hole with duct tape.


With epoxy resin, I glued the water pump on the bottom, and it was a mess. The next day, the pump got detached, I didn't have waterproof epoxy, so I decided to secure it with zip ties.


I mounted the rubber hose on the pump and make it pass through the handle of the bottle. I also add a smaller piece of hose at the end and choke it with a zip tie. Furthermore, I pierced  a hole for the spillage of the water.


On the handle, I putted a piece of aluminum wire with zip ties to hold up the hose and make it adjustable.


This was an easy project, fast and cheap. It's not supposed to be used to slice big stones, but only to cut sharp edges or small pieces.


 I hope you liked this project, please check the video on YouTube.


Thank you all! CuForming.

Friday, January 7, 2022

The resurrected Bird


I had this bird Skull laying down somewhere in my lab for maybe 2 years. I finally decided to do something with it, hoping it was going to become something cool. 

I called this project “The Resurrected Bird” because it was an unfinished (dead) project.

When I found the skull, it was half covered with copper and conductive paint. It remembered me those times when I was not very good at electroforming, struggling to find the right mix for Conductive Paint and the way to adjust Electroforming Solution.

Then I choose an Amethyst crystal to make it cool and a pair of feathers to give it wings and get it ready to fly again. 

Materials and tools that I used for this project:


Since the skull was half done, I just dip it in the conductive paint to make a dramatic entrance.

Then, with a steel mandrel and a rubber hammer, I created a ring with the 2.5 mm copper wire to hang all the parts in place.

The mandrel I used is a DIY one but it can be also purchased on the internet.


The skull already had a piece of copper wire glued to it, and after I cut it, it needs to be filed.

This is the idea for the project.


I glued everything together with 401 Korean Superglue. It's a medium viscosity CA glue, and it's perfect for this purpose.

I blocked all with a cloth pin and glue them all together.

Holes and crevices needs to be filled. I'm using relief paint, but in this case seems not to be enough.


So I decided to use Apoxie Sculpt Modeling Compound.

Apoxie Sculpt is toxic. It's always a good behavior to mix it with gloves.


To sculpt and modeling it, I'm using Silicone brushes and few more modeling tools. I can create shapes and textures to make my piece more organic.


While the Apoxie dries, I prepare the feathers to give my bird a cool Boho looking.

A 0.6 mm copper wire is perfect to make eyelets. I'm bending it in shape with round nose pliers and then wrap it around the feathers tips to make a winding effect.


Give it an adjustment with flat nose pliers and a little glue to keep them in place until I paint them with conductive paint.

I'm giving the feathers a first coat of conductive paint by dip them in to the container. 


With a brush, I'm adjusting them to give a better look.


And leave them to dry on my DIY drying rack.


A second coat is necessary and, since I don't want to lose the shape by dipping it again in the Conductive Paint container, I'm gonna use the Airbrush. It will give it a thin layer of paint and I will also keep the original texture of the feather.


The Apoxie is finally dry, so I can also paint the skull with conductive paint.


And a little bit of cleaning with acetone and cotton swabs to remove Apoxie's stains from the copper.


Time for the electroforming bath.


I'm setting the power supply to a very low voltage, so they can get covered with copper very slowly.

With copper wire, I hooked the pieces on the cathode and, once in a while, I moved them for a better development of the copper coat.

 It took me 16 hours to complete the process.

When it was ready, I washed off the electroforming solution residue and go on to the next step.

This piece needs a black patina. I prepared two plastic containers with liver of sulfur and baking soda solution.


Liver of sulfur
 is the chemical substance used to color copper. It oxidizes the metal. Coloring metals with liver of sulfur it's a matter of time. If we leave our piece in for a few seconds, this substance will oxidize the metal a little bit creating different colors and shades of orange, brown, blue, purple, gold.

Leaving our piece longer will turn the pieces black. In this case, it can be sand to reveal the copper color under it.

Since this needs to be black, I left it for almost 10 minutes. To stop the reaction, I dipped it in the baking soda solution.

Liver of sulfur has an intense smell produced by the evaporation of the sulfides, just like rotten eggs. It's recommended to use a respirator mask or work in a ventilated area.
Also, after we are done with our job, we need to neutralize it with baking soda or leave it to evaporate before flushing in the drain. It's a toxic substance, we don't want to contribute to pollution.


 Let's now remove the black patina to highlight the copper.

For this step, we need a Rotary tool such as a Dremel but, any other brand is gonna be good as well.
A respirator mask is mandatory, we don't want to be breathing the black oxide dust that is also toxic like the liver of sulfur. 

I'm using these plastic Radial Bristle Disc Brushes with different grits.

To remove the black patina, I'm using a 220 grit brush, the red one. The gray one is 2000 grit and it's for shines. It doesn't remove the black, but it's gonna make it shine.


The last step is mounting the hardware. The feathers on both sides, and a chain with a clasp.

I hope you like it and I wish you grasp something inspiring for your new projects.


Watch the video I have on YouTube, and please subscribe for more tutorial like this one.


Sadly, this bird is not gonna fly anymore, but our imagination can always do.

Thank you all. Cuforming.

Necessary Steps

How to Make Patina on Copper with Everyday Items

  Achieve Stunning Patinas on Copper with Everyday Items! Copper's natural beauty is undeniable, but a patina adds a whole new level of ...