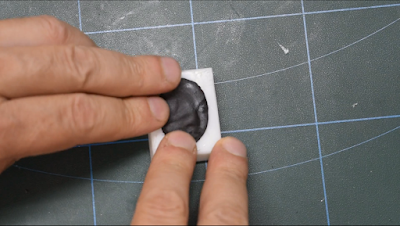
In the world of DIY projects and creative innovations, crafting your own conductive plastic can be both rewarding and enlightening. Whether you're an aspiring inventor, a jewelry maker, or just a curious enthusiast, this step-by-step guide will walk you through the process of creating your unique conductive plastic compound. This versatile material can be used in various applications, like electroforming jewelry. Plus, by recycling polystyrene, you're not only exploring your
creativity but also contributing to sustainability. So, let's dive in and uncover the secrets of crafting conductive plastic!
Materials You'll Need
Before we start, let's gather the essential materials and tools:
- Polystyrene (PS - EPS): You can source this from disposable cups, food containers, old CD cases, or packaging materials. Look for items with the recycling code "6," which indicates polystyrene.
- Acetone https://amzn.to/3ZsDDGM | https://ebay.to/3UGNC7W
- Graphite Powder https://amzn.to/3ER2L0u | https://ebay.to/3Er8N6N
- Glass Stirring Rod https://amzn.to/3RxAUdp | https://ebay.to/3VLTH3z
- Plastic Wrap: It will help you to handle and shape the compound.
- Silicon Molds (Optional) https://amzn.to/3ENwlUL | https://ebay.to/460XXBr
- Gloves: To protect your hands during the process.
- Syringe: To remove the acetone.
The basic working Formula:
- 25ml Acetone
- 3g Expanded Polystyrene
- 10g Graphite Powder
Step 1: Dissolving Polystyrene in Acetone
- Begin by cutting or breaking the polystyrene into smaller pieces for easier dissolution.
- In a well-ventilated area, pour a quantity of acetone into a container.
- Slowly add the polystyrene pieces into the acetone, stirring gently until they dissolve. You'll notice the mixture turning into a dense substance. This is your base material.
Step 2: Adding Graphite Powder and Stirring
- Introduce the graphite powder into the acetone-infused polystyrene. The quantity I use is the same for any of my formulas.
- Stir the mixture thoroughly until the graphite powder is evenly distributed. This is just the start point of the process.
Step 3: Allowing the Mixture to Set
- Let the composite mixture set for a while, like a day or so, to ensure that the excess acetone creates a layer on top of the mixture.
Step 4: Tempering
- Removing Excess Acetone
This step will facilitate the drying part. Compress it with the help of a piece of plastic wrap to make more acetone escape from the mound. Use paper towel if needed.
- Letting It Dry and Harden
- Remelting in Acetone
Step 5: Shaping and Texturing
- Your conductive plastic is now ready to be shaped and textured according to your project's requirements. You can mold it by hand (while wearing gloves), shape it within plastic wrap for unique textures, or use silicon molds or any kind of shaping tools for intricate designs.
Using Conductive Plastic in Electroforming
The pliability of conductive plastic plays a significant role in the electroforming process, as it allows for easy shaping and adherence to the object you wish to electroform without the need of using any conductive paint to cover the surface. Whether you're creating jewelry or experimenting with complex metal sculptures, conductive plastic can be a useful material in the electroforming journey. Its versatility and conductivity can offer electroforming artisans time and materials saving, where imagination knows no bounds.
The material's ability to melt under heat opens an intriguing avenue for those who own a filament 3D printer. This innovative material can take your 3D printing experiments to the next level, enabling you to craft intricate designs, prototypes, and functional components with ease.
If you wanna learn more about my experiments with this material, please check the link below, to download a FREE eBook with all the info and more recipes.
Crafting your conductive plastic opens up a world of possibilities for creative expression and innovation. This versatile material, born from the fusion of polystyrene, acetone, and graphite, can be customized to suit your specific needs. Whether you're crafting jewelry, experimenting with 3D printing, or exploring new frontiers in DIY projects, your conductive plastic is a valuable resource waiting to be molded into shape. Moreover, its unique conductivity and suitability for electroforming make it an exciting tool for artisans and jewelry makers, allowing them to transform ordinary objects into stunning metal-coated artworks.
By recycling polystyrene into this inventive material, you not only explore your creativity but also contribute to sustainability, reducing waste and giving new life to everyday items. So, roll up your sleeves, get creative, and see where this unique material takes you on your journey of discovery, invention, and electroforming mastery!
Don't forget to subscribe to my channel for more electroforming tips and tutorials.
I wanna thank everyone who has read this blog and has shown an interest in electroforming. I hope that you have found it informative and helpful. Happy electroforming! CuForming!


