Thursday, May 19, 2022

Copper Electroformed Miniature Tree


May 16th is a day of love for nature and especially for trees. It is the “Hug a Tree” day and for the occasion I wanted to make a miniature tree made out of copper and I used Aventurine pebbles to resemble leaves.

 Tools and material:

From the pruning I saved last time I cleaned my Lemon Tree, I choose a branch that looked perfect to be the trunk.


The nippers weren't strong enough to cut big parts, so I used my bandsaw to do the job.
Then I cut small parts to make other branches.


With a round burrs bit and my rotary tool, I made holes on the trunk to glue the branches. I tried to make it more organic possible. CA glue was the best choice to do this part.


For the base, I used a piece of cork that I found on the beach. I made a hole of the same diameter of the trunk with my drill press. In this case, I used a 10 mm bit. 


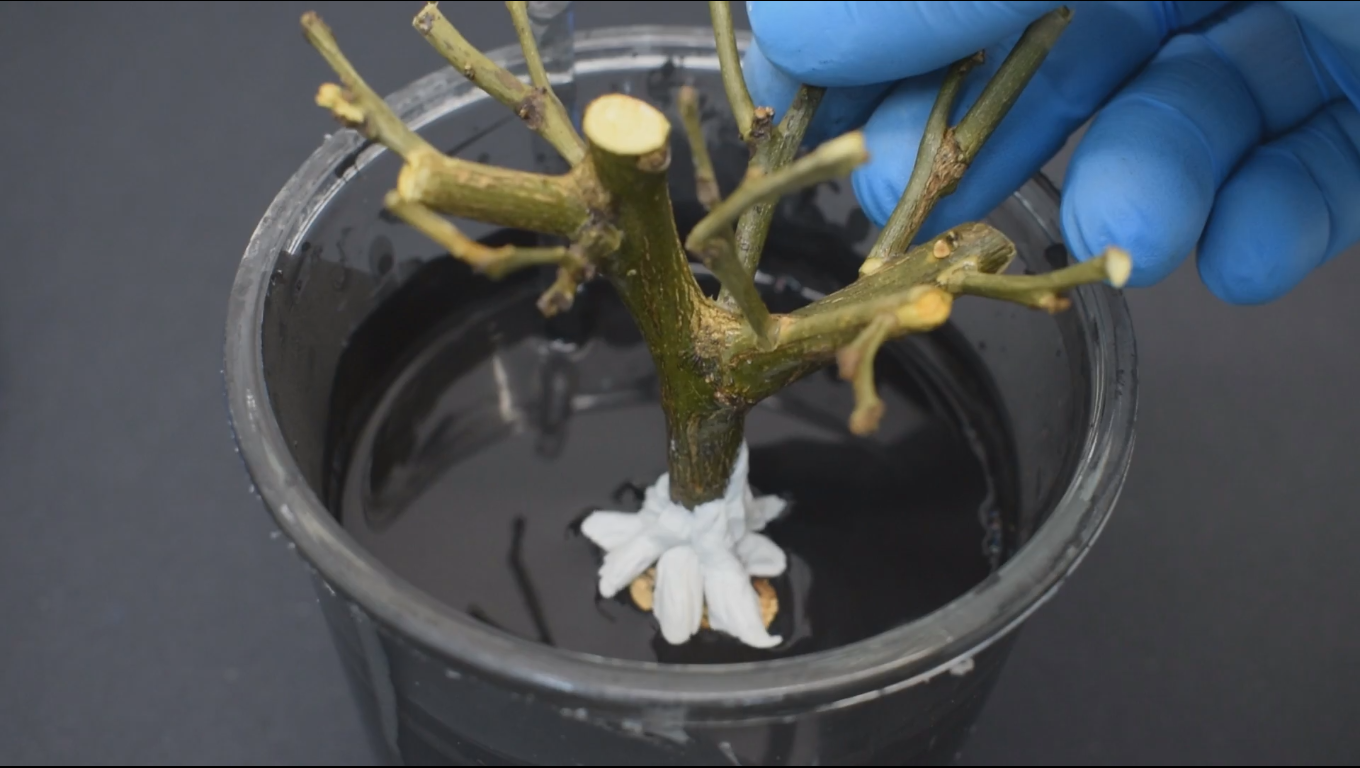
After I glue them together it starts to take the shape of an actual tree, but it was not enough natural and then, with Apoxie Sculpt, I made some roots on the bottom.


I mixed the A and B parts with gloves because the two parts separated are toxic to be touched, but once they are combined, this putty is safe for the skin.


I made a few pointy sausages and put them all around the trunk.


With a silicon brush I made wrinkles and with a balled tool I try to make the Apoxie to stick better on the wood.


After 12 hours of drying, I dip the piece in my Conductive Paint. The container was too narrow for the tree top, so I had to use a brush for the missing spots.


To resemble leaves, I pulled out of my stash these Aventurine tumbled pebbles. This time I used UV resin to glue them on the branches. I know that UV resin is not very sticky on smooth surfaces, but I needed to be fast for all these leaves. They had to be on, long enough for the copper to secure them.


 Anyway, it took me a while to glue all of them with the UV Lamp.


To repaint all the joints with Conductive paint I needed the same amount of time, but I finally manage to get it done.

With a cotton swab and a little solvent, I cleaned some smudges that I made on the stones.


I wrapped around the tree a piece of thin copper wire to hang it on the cathode rod of my tank and get it ready for the bath.

 And the cork proved to be such due to its fame. It's floating! I had to add a stiff wire on it to keep it underwater. 

 Start the power supply to the minimum current flow and leave to get coated in copper.

 I checked it every once in a while and when I saw that the cork part was completely covered in copper I change the position of the tree.

 Since it had a few spots uncoated, I crank up the current and let it be. Sadly the brightener fades off, so I had to add some more and, after not much longer, it starts to shine again, and I removed it from the tank.


 I washed off the tree all the electroforming solution residue and I put it in a container with water and a big amount of Liver of Sulfur because I wanted it to be black.


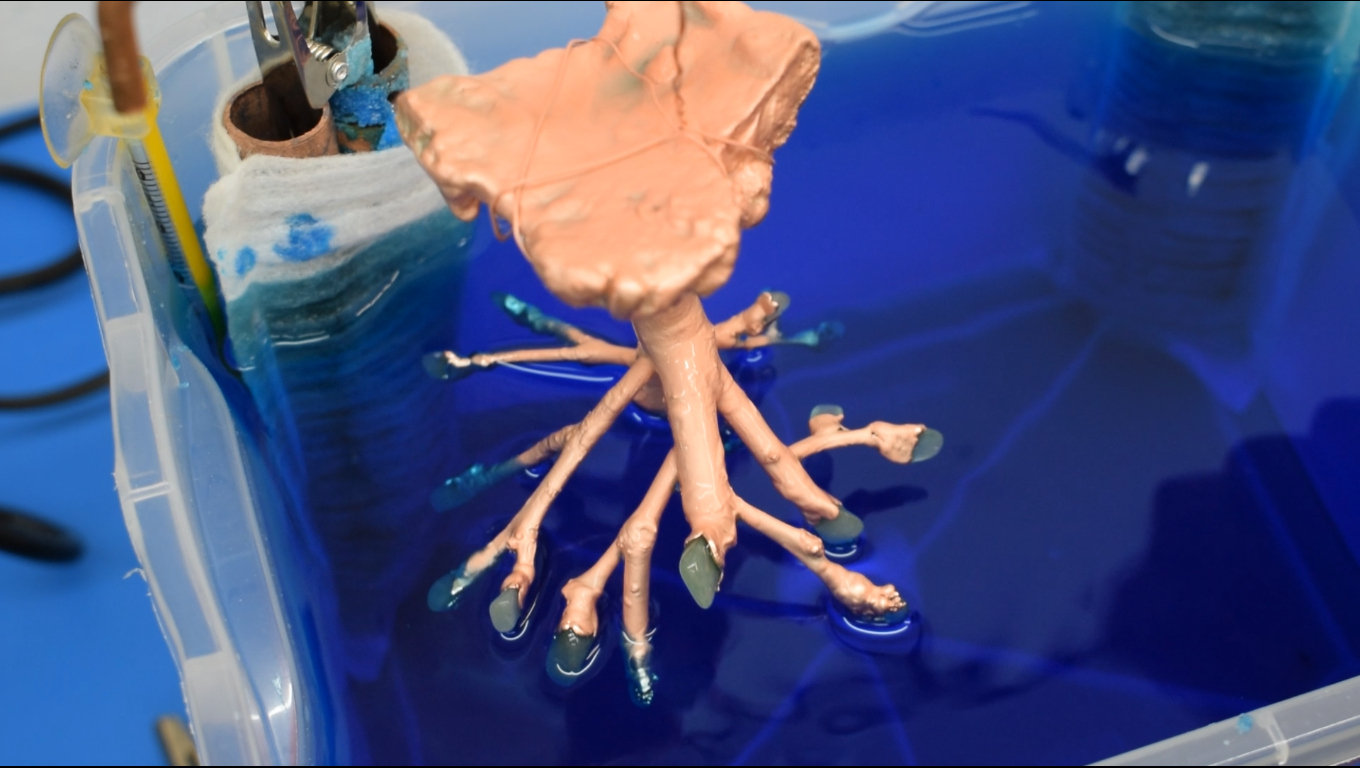
After an hour or so, I took it out and wash the residue. 

I didn't toss all the yellow liquid in the sink this time because it was too much, so kept it in the same container with the lid on. But remember, every time you wanna get rid of Liver of Sulfur, you need to neutralize it with bleach.


Now I'm going to finish the tree with two bristle brushes. I put on my respiratory mask and start with the 600 grit to expose the copper on the trunk, roots, and branches.


 I used the 2000 grit on the base to leave it black. This bristle is not as strong as the 600, so it will only make the black color to shine.


I hope you will be enjoyed by this project. Watch the video I have on YouTube, and please subscribe for more tutorial like this one.
 

Thank you all. Cuforming.

Sunday, May 8, 2022

Graphite Conductive Paint Recipe for Electroforming


 Lots of people still don't understand how it is Possible to make electricity go through insulating materials. Well… Conductive paint is the answer! In this video, I'm gonna show you how to make and use Graphite Conductive Paint. If you wanna try this DIY recipe, you can find it on my Beacons page from the link below.

To celebrate 200 Subscribers on my YouTube Channel and the “Love a Tree” Day I will announce 10 giveaways of this recipe in my next Video on May 16th. Please Subscribe to my YouTube Channel and comment “I Love Trees” in the comment section to be selected for the giveaway of the Conductive Paint Recipe. Thanks to all of you!!!

You can get the “Graphite conductive Paint Recipe” from “HERE”


Mix the ingredient in the way described in the recipe.

Application

First method:

 Just like any other paint, you can brush it on your piece. This simple and easy method will leave strokes on any plain surface. If you are planning to make a smooth surface, this is not the right way to apply the paint. Do it if you wanna make a standing texture.


Second method:

For a much more uniform result, the best way to apply the paint is by tapping it with a brush on top of your piece. Any original texture belonging to your pieces will being shown on the final copper coat.


Third method:

If you are planning to paint things that don't hold their shape well such as feathers, fresh leaves, fabric, or paper you can use an airbrush. It will deposit a thin coat of paint in a way that it won't alter the shape. This method require more than one layer of paint to be applied.


Fourth method:

This is the easiest and faster way to apply a prominent coat of paint in just one move. Dip directly your piece in the container and that's it. You only need to be aware of the porosity of your piece. A very porous piece can stay in the paint for just a second, for plastic's objects a few seconds more would be better.


How to make your paint more thin or thick:

If you leave the paint on a shelf, the ingredients in it will settle, and you will see a layer of solvent on top. Just remove some of that solvent with a dropper to thick the paint. If you wanna make it more liquid (to use it with the airbrush) just add a little bit of solvent to your taste.

Some issues:

The tendency of the paint is to settle and the components to get separated, so you need to mix it once in a while. Stir it or shake it to blend it well.

When you put into an electroforming bath a piece that is covered with conductive paint, it could happen sometime that bubbles will appear on the surface of the graphite. To solve this problem, you can just brush them away with the same electroforming solution of your bath to get all the spots wet. If you leave the bubbles on it, the air will prevent the copper to adhere to the graphite. This issue can happen on organic material such as any plants parts.


List of  surfaces that can be covered with this paint:

  • Dry leaves
  • Fresh leaves
  • Lace
  • Paper or cardboard
  • Stones
  • Bones
  • Plastic
  • Wood
  • Bark
  • Glass
  • Feathers
  • Plaster
  • Branches
  • Teeth
  • Insects
  • Resin
  • Fabric
  • Shells
  • Wax
  • Ceramic
  • .....and more.

 Watch the video on YouTube and subscribe.


Thank you all. CuForming.

Necessary Steps

How to Make Patina on Copper with Everyday Items

  Achieve Stunning Patinas on Copper with Everyday Items! Copper's natural beauty is undeniable, but a patina adds a whole new level of ...