
Bird Foot Smoky Quartz Copper Pendant


This morning I found a bird foot on my roof that it was probably from a sparrow killed by Crows. Obviously, I decided to make a jewel with it, and it seems a nice Idea to make it look like it was grabbing a stone. A smoky quartz crystal was the best option for a Gothic Style.


Tools and material


Any animal parts need to be clean before any use. They contain bacteria and organic remains that can produce smell or infections. So the first thing to do is to submerge them in Hydrogen Peroxide. It will react with blood and any living microorganism. It will also soften the skin and the gristle, to make it easier to shape it on the crystal that we are going to work with. Leaving it overnight is gonna be enough.


I make it fit on the crystal and leave it another day, to let it get hard back again.


With CA glue, I add a jump-ring on it.


I decide to dip the pieces in conductive paint separately to be sure there were not missed spots.


And then I glued all together.


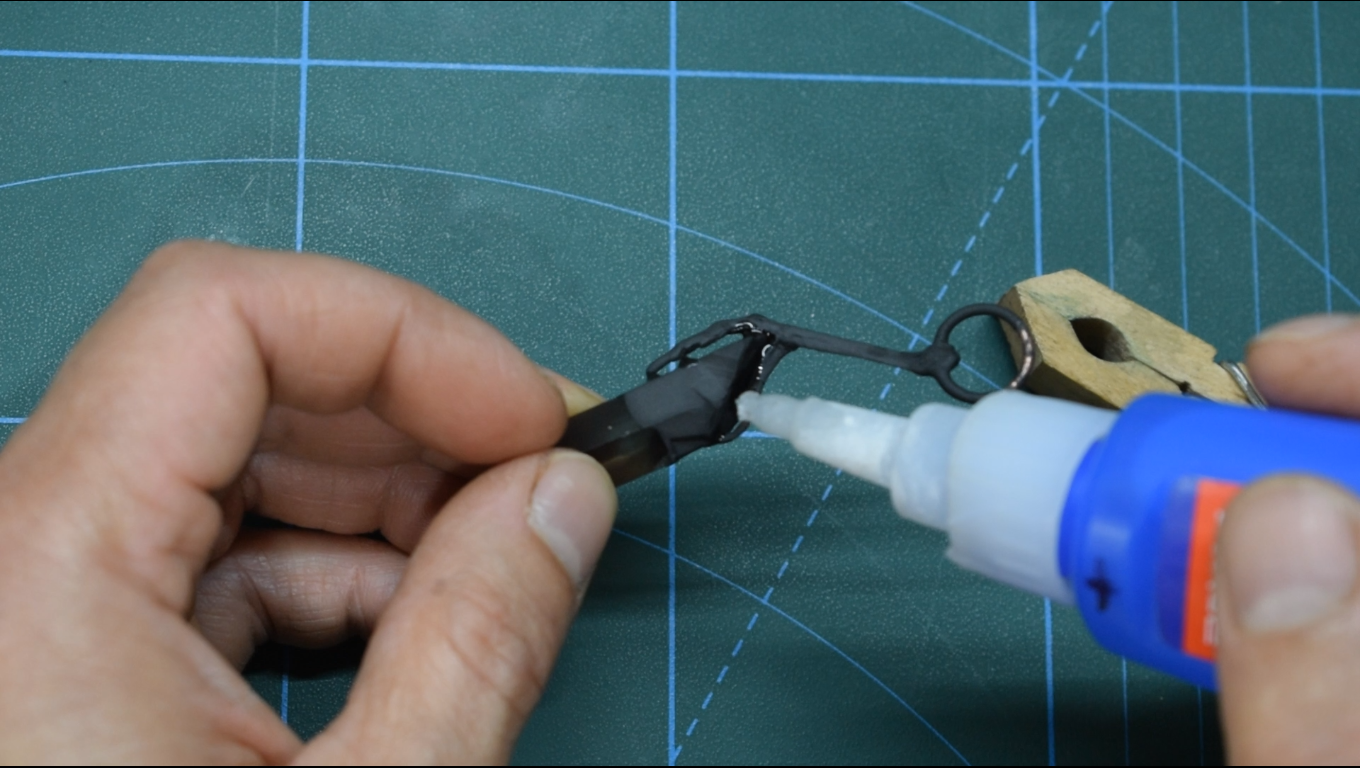
The glue on the graphite will prevent conduction, so I repaint all the glued spots again.


After letting it dries for an hour, I dip it in the electroforming bath.


Start with low current and gradually rise it to almost the maximum value possible.


In total, I spent 12 hours to complete this piece. It didn't take longer because I put it in the tank all alone.

A wash with water to remove the residue of electroforming solution and ready to make patina.


Thirty seconds in a mild solution of liver of sulfur to make a dark rainbow effect and wash again.


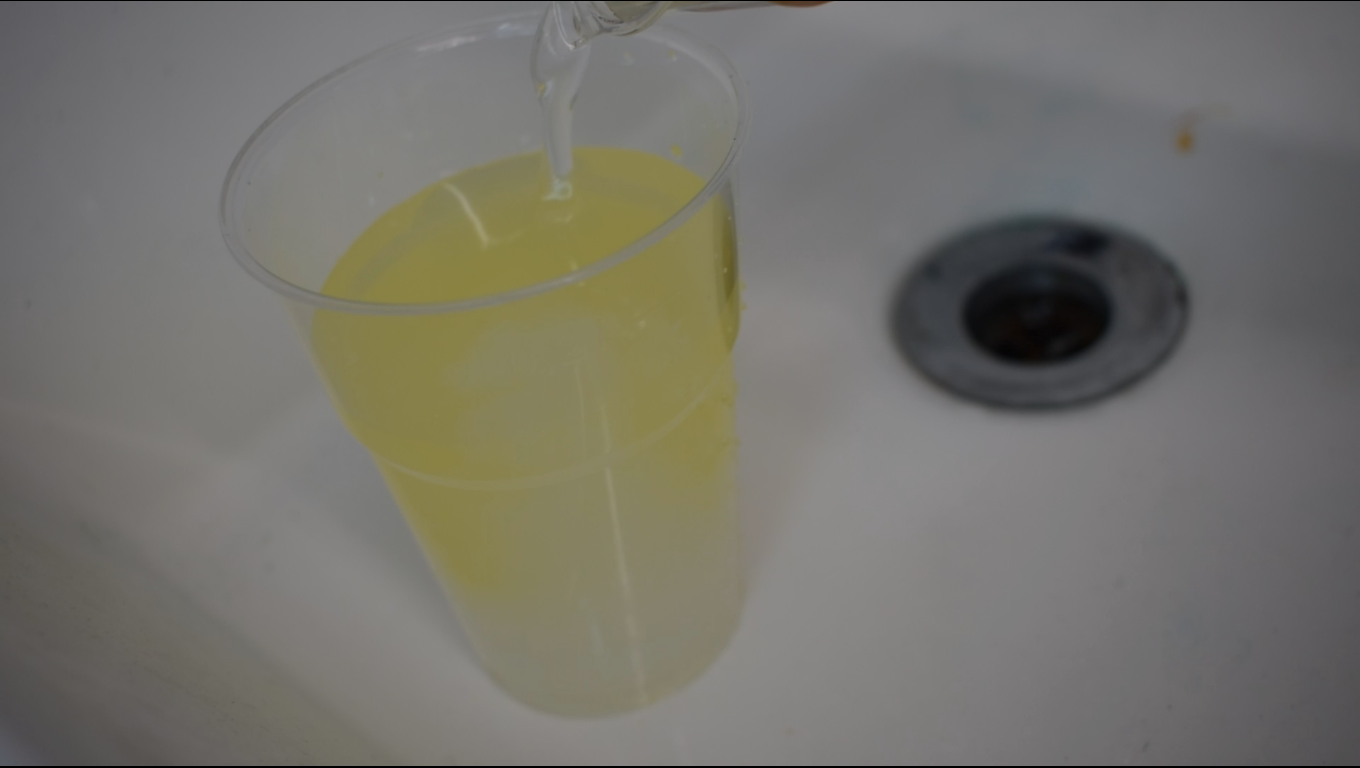
With bleach, I neutralized the liver of sulfur, so it's safe to be flushed in the sink.


Add a chain, and it's ready for a photoshoot.


Watch the video on YouTube and subscribe.


Thank you all. CuForming.

Comments

Popular posts from this blog

From 3D Printing to Electroforming - Here's my Unique Wings Pendants

  How to Make Magical 3D Printed Electroformed Wing Pendants! Hey everyone! 🌟 Today, we're going on a super fun and creative adventure. We're going to make magical pendants with 3D printed wings of butterflies, fairies, demons, and angels. This project combines the wonders of 3D printing with the process of electroforming to turn simple ideas into jewelry pieces. If you love getting creative and adding a bit of sparkle to your crations, you're in the right place. I'll take you through each step, from designing and printing to assembling and electroforming.  Grab your supplies and let's get started on this magical journey together! 🦋✨ Supplies and Materials Design and 3D Printing My pre-made designs  https://website.beacons.ai/cuforming/3d-printables-shop 3D printer  https://amzn.to/45dxFg5 |  https://ebay.to/3WVt5ko Resin  https://amzn.to/3VeiGif |  https://ebay.to/3RWJcLZ UV Lamp  https://amzn.to/3wNMJ7e |  https://ebay.to/4bR9R3E Smoot...

How to Make Patina on Copper with Everyday Items

  Achieve Stunning Patinas on Copper with Everyday Items! Copper's natural beauty is undeniable, but a patina adds a whole new level of depth and character. While natural patinas take time to develop, this tutorial will show you how to use readily available household items to create stunning patinas on copper quickly and easily. Material you need: Copper jewelry Copper wire https://amzn.to/3Q3yOjO | https://ebay.to/3JiRCIb Spray bottles https://amzn.to/4aQYZSA | https://ebay.to/3U32G0Y Containers  https://amzn.to/3vQyMF9 | https://ebay.to/3W1zyK2 Plastic wrap Ammonia https://amzn.to/3U339jK | https://ebay.to/4cZTBhT Vinegar Distilled water Table salt Baking soda Soy sauce https://amzn.to/4d1pIy2 | https://ebay.to/4cQLcxg Cooked rice Paper towels Ziplock bags Wood chips Protective gloves (optional) Eye protection (optional) Brush (optional) Clear lacquer https://amzn.to/4d0HEZg | https://bit.ly/3vXnr6b The Experiments. Get ready to experiment and create a spectrum of col...

How I Anodized Titanium Hooks for My Copper Earrings

  Hello, fellow makers! Today, I’m sharing a fun project I just finished: anodizing titanium hooks for a pair of copper earrings I made. I wanted to experiment with color on the hooks to match the patina on the copper. Here’s how it all went down, complete with a few lessons learned along the way! Materials You’ll Need Before diving into the process, here’s a list of all the materials I used: Titanium hooks (or titanium wire) https://amzn.to/4eJOIdg | https://ebay.to/4fnZg1Z Baking soda (for the electrolyte solution) Water (to mix with the baking soda) Beaker (or any non-metallic container to hold the solution) Stainless steel bar (to use as the cathode) Alligator clips (to connect the titanium and stainless steel bar to your power supply) 30-volt, 5-amp adjustable power supply (or a higher voltage 60V power supply for anodizing) https://amzn.to/3BIhjkT | https://ebay.to/3zXqxJq Why Titanium? First things first: why titanium? Well, titanium is hypoallergenic, which makes i...