To make this ring with Lapis Lazuli a little bit special, I round up the ends of the loop with a torch. The flame and gravity take part in this easy project that every beginner can do.
I'm also gonna show a few more advises about stone preservation and power supply settings.

Tools and material for this project:
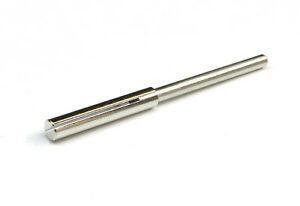
- Copper wire 2.5 mm
- Lapis Lazuli Stone
- Pickling solution
- CA glue
- Conductive Paint
- Liquid Latex
- Distilled water
- Liver of Sulfur
- Bleach
- Zapon
- Nippers
- Steel Mandrel
- Propane torch
- Tweezers
- Rubber Hammer
- Rotary Tool
- Diamond cutting wheel
- My DIY Water dropper
- Brushes
- Wooden stick
- Cloth pins
- The entire electroforming equipment
- Plastic containers
- Polishing pads for metal
- Rotary split mandrel
Starting by cutting a piece of copper wire a little longer than the length I need. Then I bent it to a horse shoes shape and set it on a copper pipe with the ends pointing downward.

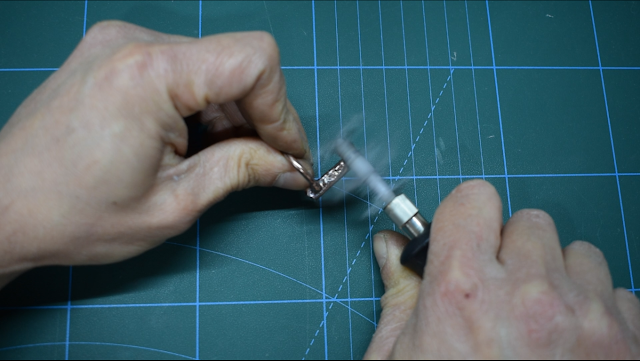
With my torch, I heat the ends to melt them until two drops of liquid copper can be seeing.

Then I quench the piece in water and put it in pickling solution to clean fire scales.

With a steel mandrel and a rubber hammer, I harden the ring a little to let it keep the final shape.

Using my DIY water dropper and the rotary tool with a diamond cutting wheel, I cut a piece of lapis lazuli slab that was too long for a ring.


To join the stone and the loop, I used CA glue. The loop was hard enough and precise to stand on the stone by itself.


I apply conductive paint to cover the stone. I'm not doing the usual stoke, I'm applying it coarsely to bring out texture. Conductive paint needs to dry for at least one hour.

With a wooden stick, I apply liquid latex on the top of the exposed stone to protect it. Lapis lazuli can be dissolved in the electroforming solution and being ruined. The Solution itself, reacting with the stone, can be also get ruined.

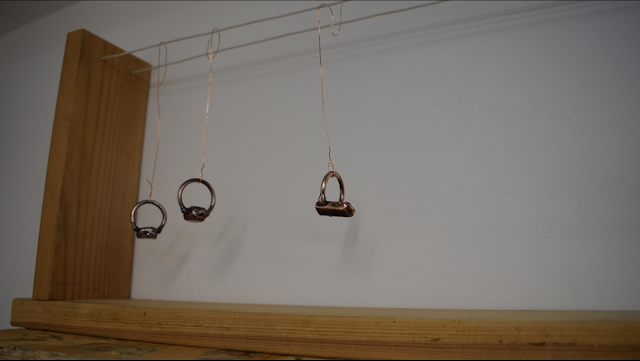
After the latex dries, I dip my piece in the electroforming tank. Right after the piece got submerge in the blue liquid, bubbles can form on top of the graphite paint because of surface tension. I give it a few strokes with a brush to break the tension and prevent more bubbles to form again.

When everything is secured with cloth pins, I start my power supply and set it to the low amperes range.

The range must be between 0.01A and 0.1A.
To set the right current, we need to multiply the surface of our pieces in inches square by this range.
I made a few more pieces and all the surface measured approximately 4 inches square.
I decide to proceed in 3 stages. Low stage for 2 hours at 0.04A, Medium stage for 8 hours at 0.20A and Hi stage for 14 hours at 0.40A.


When, after 24 hours, everything was finally ready, I removed all the pieces from the bath and wash them in distilled water.

I prepared a container with distilled water and a bit of liver of sulfur and dip all the pieces together for 10 minutes to get a brown patina.


Always remember to neutralize liver of sulfur before flush it in the drain. In this case I did it with bleach, but backing soda can be used too. Also, you can leave it evaporate on its own in a ventilated area. Liver of sulfur has an intense smell produced by the evaporation of the sulfides, just like rotten eggs. Don't breathe it.

After that, I wash all pieces back in water and finally remove the latex coat to reveal the stone under it.

With a polishing pad for metals, I tried to clean some of the black patina by hands. It was a very tedious job, so I mount a split mandrel on my rotary tool and insert a piece of polishing pad. In less time, I was being able to reach all the gaps and crevices of the ring and bring back the shine.

To protect it from further oxidation, I dipped it in Zapon lack. It's a varnish specific for metal jewelry. Few seconds in it and then a little centrifugal motion to remove the excess.


Zapon needs at least 2 days to dry completely.
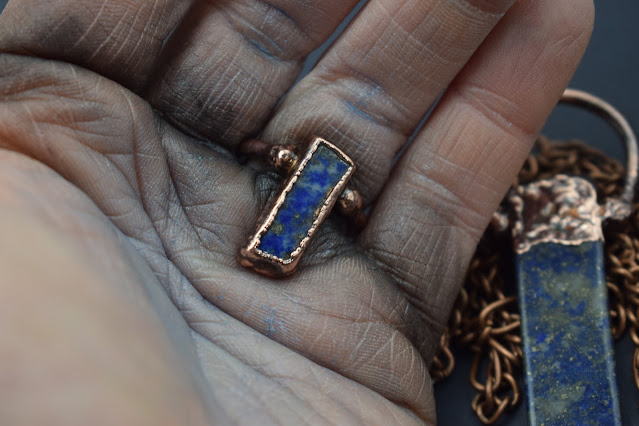
Here is the final result.
Please check the video on YouTube.
Thank you all. CuForming.
Comments
Post a Comment