Thursday, October 12, 2023

Crafting Halloween 3D Printed Electroformed Jewelry

Crafting Halloween 3D Printed Electroformed Jewelry


Halloween is a season that beckons us to embrace creativity and step into the extraordinary. In this latest project, we embarked on a captivating journey into the world of jewelry crafting, combining cutting-edge 3D printing with the age-old art of copper electroforming. The result? A stunning collection of Halloween-themed jewelry that promises to bewitch and bedazzle. In this blog, I'm thrilled to take you behind the scenes of this project, unveiling the techniques, and the final creations.


The Ingredients for this Magical Recipe:

Before we delve into this electroforming project, let's first take a glance at the essential supplies that made it all possible:
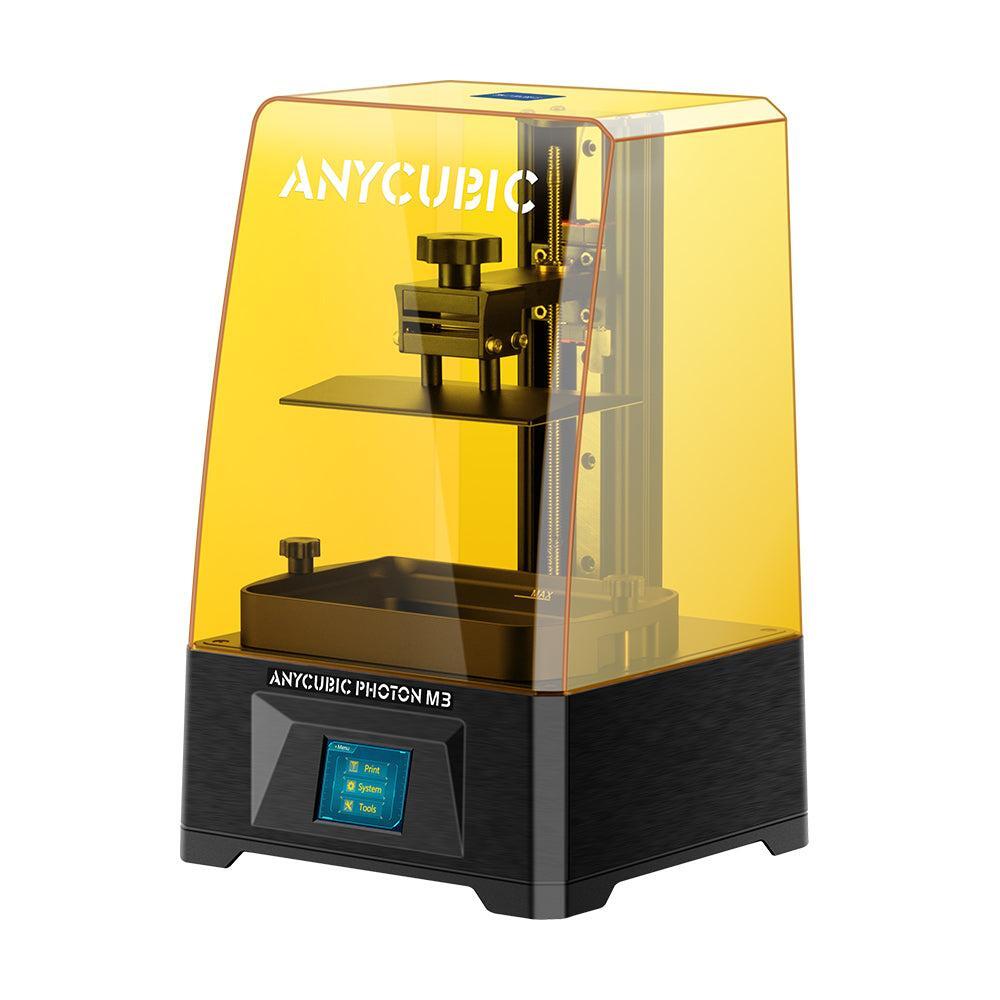
The Project:

My ambitious project encompassed crafting a diverse range of jewelry pieces, each inspired by the spirit of Halloween:

  • Pumpkin Pendant: A playful pumpkin-shaped pendant that captures the essence of Halloween's favorite gourd.

  • Funny Ghost Earrings: A whimsical pair of ghost earrings designed to add humor to your Halloween attire.


  • Skull with Tiger Eye Cabochon: A beautifully haunting skull pendant adorneing a mesmerizing Tiger Eye cabochon.


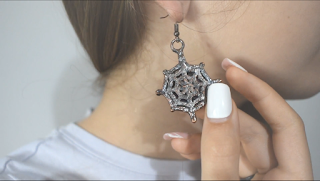
  • Spiderweb Earrings with Amethyst Cabochon: Delicate spiderweb earrings with an enchanting Amethyst cabochon at their heart.


  • Bat Ring: A stylish bat-themed ring featuring a small Amethyst cabochon.


  • Spiderweb Ring: An intricate spiderweb ring that exudes a sense of mystery.


  • Bat Stud Earrings: Subtle yet stylish, these bat stud earrings provide the perfect finishing touch to your Halloween look.


The Process:

This jewelry-making adventure involved the following steps:

1. Printing All the Pieces: The project began with the creation of all jewelry pieces through 3D printing. I used a resin 3D printer to meticulously craft each design.


2. Preparing the Pieces: Once the pieces were printed, we embarked on preparing them. This involved sanding all the imperfections of the prints, attaching bails, jump rings, and stones where needed, accomplished by using CA glue. Bezel the tiger eye cab with copper tape and solder the bail. The whole preparation needs to ensure the structural integrity of each piece. Paint the stones with nail polish to protect them from the acidic environment of the electroforming bath.


3. Painting with Conductive Paint: To allow the electroforming process, I applied conductive paint to the prepared pieces. This conductive paint served as the pathway for copper to work its magic.


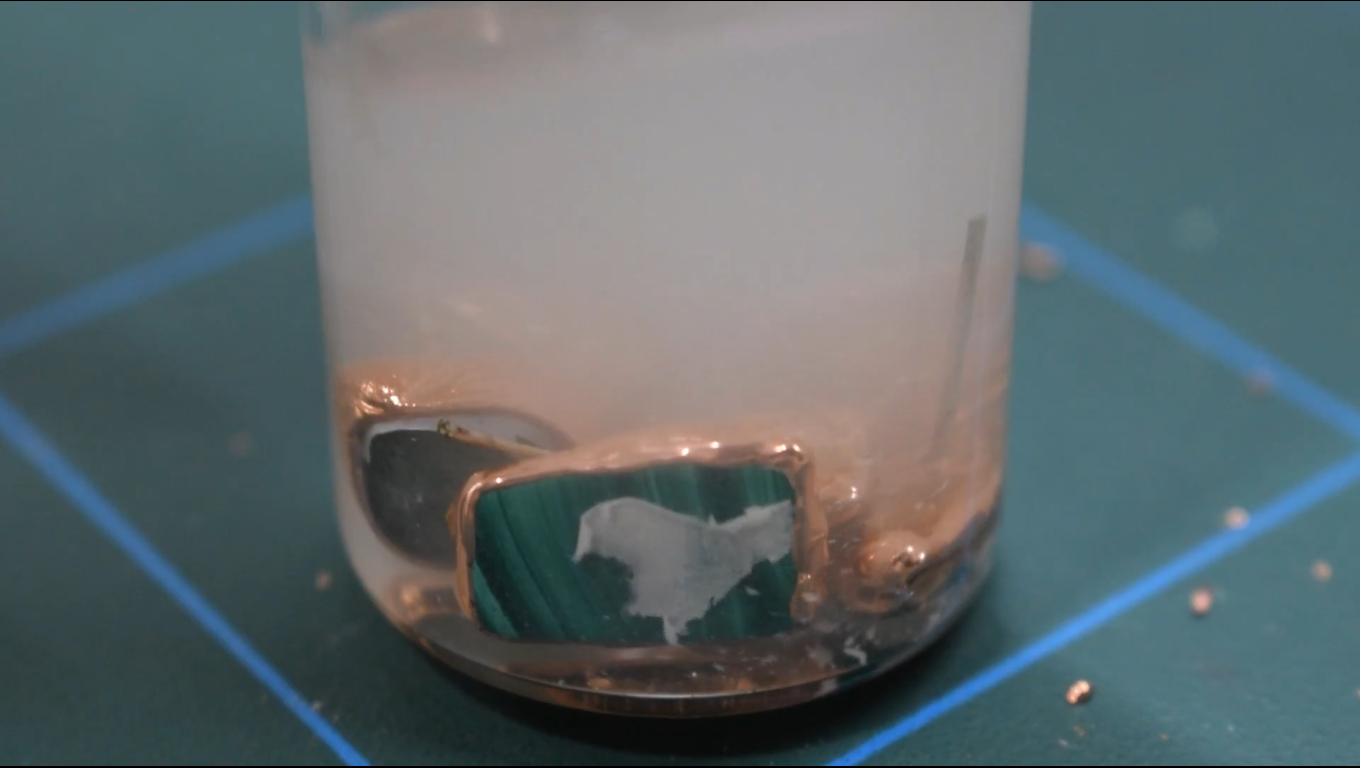
4. Electroforming: The heart of the project, electroforming, was where the real transformation took place. Before starting the process, I need to make a calculation of the entire surface area of the pieces to be sure of how much current must be applied to them. The surface, if measured in centimeters, must be multiplied by 0.002 Amperes; If measured in inches, must be multiplied by 0.05 Amperes. The painted pieces were submerged then in the electroforming bath, initiating the process of copper deposition. Electricity played its role, as the copper solution adhered to the conductive paint, gradually covering the jewelry pieces.


5. Patina with Liver of Sulfur: For an added touch of intrigue, I used Liver of Sulfur to create a striking black patina on the copper. This patina enhanced the depth and mystique of this jewelry.


6. Polishing: This journey concluded with a meticulous polishing process. Using a rotary tool and bristle brush wheels, I ensured that this jewelry pieces shone brilliantly, revealing their captivating beauty. For last, a dip in acetone to remove the remained nail polish to reveal the stones underneath.


This multi-step was a blend of creativity and techniques all together that seamlessly merged modern innovation with timeless craftsmanship.


Creating these Halloween-themed electroformed jewels wasn't just an art project; it was a thrilling journey filled with laughter and experimentation. From 'eureka' moments when my designs came to life, to inevitable giggles when things didn't go as planned, it was a project that truly encapsulated the joy of creativity.

I'm excited to share my entire adventure with you, and the best way to experience it is through the related YouTube video


This Halloween, why not infuse a little DIY magic into your holiday? Crafting your own jewelry can be both enchanting and entertaining. Plus, the end result is a unique collection of jewelry that captures the essence of Halloween like nothing else.

So, gather your supplies, unleash your creativity, and let's get crafting – because Halloween just got a lot more stylish and fascinating. Happy haunting, and enjoy creating your own magical jewelry pieces!

Saturday, September 23, 2023

Recycled Crafting Conductive Plastic: A Step-by-Step Guide


In the world of DIY projects and creative innovations, crafting your own conductive plastic can be both rewarding and enlightening. Whether you're an aspiring inventor, a jewelry maker, or just a curious enthusiast, this step-by-step guide will walk you through the process of creating your unique conductive plastic compound. This versatile material can be used in various applications, like electroforming jewelry. Plus, by recycling polystyrene, you're not only exploring your creativity but also contributing to sustainability. So, let's dive in and uncover the secrets of crafting conductive plastic!


Materials You'll Need

Before we start, let's gather the essential materials and tools:


The basic working Formula:

  • 25ml   Acetone
  • 3g       Expanded Polystyrene
  • 10g     Graphite Powder 


Step 1: Dissolving Polystyrene in Acetone

  • Begin by cutting or breaking the polystyrene into smaller pieces for easier dissolution.
  • In a well-ventilated area, pour a quantity of acetone into a container.
  • Slowly add the polystyrene pieces into the acetone, stirring gently until they dissolve. You'll notice the mixture turning into a dense substance. This is your base material.


Step 2: Adding Graphite Powder and Stirring

  • Introduce the graphite powder into the acetone-infused polystyrene. The quantity I use is the same for any of my formulas.
  • Stir the mixture thoroughly until the graphite powder is evenly distributed. This is just the start point of the process.


Step 3: Allowing the Mixture to Set

  • Let the composite mixture set for a while, like a day or so, to ensure that the excess acetone creates a layer on top of the mixture.

Step 4: Tempering

  • Removing Excess Acetone
            Carefully pour off any excess acetone from the top of the mixture with a syringe.
            This step will facilitate the drying part. Compress it with the help of a piece of plastic wrap to                make more acetone escape from the mound. Use paper towel if needed.


  • Letting It Dry and Harden
            Leave the material exposed to air in a safe, well-ventilated area. Over time, it will begin to                    harden. This process may take several hours or longer, depending on the thickness of the shape             you decided to make.
  • Remelting in Acetone
            Once the material has dried and hardened, you can simply melt it again by immersing it in                    acetone. This will complete the entire process that I called "tempering". It will further enhance                its properties and readies the material for use in various applications.

Step 5: Shaping and Texturing

  • Your conductive plastic is now ready to be shaped and textured according to your project's requirements. You can mold it by hand (while wearing gloves), shape it within plastic wrap for unique textures, or use silicon molds or any kind of shaping tools for intricate designs.


Using Conductive Plastic in Electroforming

The pliability of conductive plastic plays a significant role in the electroforming process, as it allows for easy shaping and adherence to the object you wish to electroform without the need of using any conductive paint to cover the surface. Whether you're creating jewelry or experimenting with complex metal sculptures, conductive plastic can be a useful material in the electroforming journey. Its versatility and conductivity can offer electroforming artisans time and materials saving, where imagination knows no bounds.


 The material's ability to melt under heat opens an intriguing avenue for those who own a filament 3D printer. This innovative material can take your 3D printing experiments to the next level, enabling you to craft intricate designs, prototypes, and functional components with ease.


If you wanna learn more about my experiments with this material, please check the link below, to download a FREE eBook with all the info and more recipes.

- Download the FREE eBook -


 Crafting your conductive plastic opens up a world of possibilities for creative expression and innovation. This versatile material, born from the fusion of polystyrene, acetone, and graphite, can be customized to suit your specific needs. Whether you're crafting jewelry, experimenting with 3D printing, or exploring new frontiers in DIY projects, your conductive plastic is a valuable resource waiting to be molded into shape. Moreover, its unique conductivity and suitability for electroforming make it an exciting tool for artisans and jewelry makers, allowing them to transform ordinary objects into stunning metal-coated artworks.

  By recycling polystyrene into this inventive material, you not only explore your creativity but also contribute to sustainability, reducing waste and giving new life to everyday items. So, roll up your sleeves, get creative, and see where this unique material takes you on your journey of discovery, invention, and electroforming mastery!


 Don't forget to subscribe to my channel for more electroforming tips and tutorials.

I wanna thank everyone who has read this blog and has shown an interest in electroforming. I hope that you have found it informative and helpful. Happy electroforming! CuForming!

Monday, August 28, 2023

How to Make Copper Electroformed Earrings With This Simple Technique


Are you ready to dive into the world of creative craftsmanship and jewelry-making? In this guide, we'll walk you through the fascinating process of creating copper electroformed stud earrings. With this simple technique, you will be able to electroform stud earrings with copper without plating the earring post. So, gather your supplies, unleash your creativity, and let's get started!


Supplies You'll Need:

Step-by-Step Process:

1. Preparing the Stones: Begin by selecting the stones or crystals you'd like to incorporate into your earrings. Glue these stones onto the earring posts using CA glue, ensuring they are level and secure. Allow the stones to cure.


2. Painting Translucent Stones: For stones with translucency, use a silver sharpie to color the back surface. This creates a mirror effect that enhances the stone's reflection.


3. Protecting Carbonate Stones: If using stones with a carbonate composition or a hardness lower than 6 on the Mohs scale, protect them by applying a coat of clear nail polish. Ensure that all exposed surfaces are covered.


4. Applying Graphite Paint: Coat the conductive paint with a layer of thick graphite paint. The graphite paint should make contact with the metal to ensure proper conduction.


5. Connecting the Wires: Wrap thin electrical wire around the posts to create a connection between the stones and the conductive mixture. A rotary tool can make this step quicker and more precise.


6. Protecting the Posts: Use liquid latex to cover the earring posts completely. This protective layer will prevent copper plating on the posts, preserving their original metal.


7. Electroforming Process: Place the earrings into the electroforming bath, where they will receive a copper plating. The copper will deposit on the conductive areas, but not on the latex-covered posts.


8. Unveiling the Finished Earrings: After sufficient time in the electroforming bath, remove the earrings and wash off any residue. Rinse off any remaining protective coatings with acetone. You'll now see the stunning transformation of the copper-plated earrings.


9. Optional Patina and Finishing: If desired, apply patina solution to enhance the texture and depth of the copper. Rinse with water and polish the earrings with a cloth to achieve a beautiful shine.


10. Admire Your Creations: Finally, unveil your handcrafted copper electroformed stud earrings, each a true testament to your artistic flair and skill. Feel free to experiment with different stones, shapes, and patinas to create a range of unique pieces.


Creating copper electroformed stud earrings is a fascinating journey that combines artistic vision with technical finesse. By following these step-by-step instructions, you've unlocked the potential to craft beautiful, one-of-a-kind jewelry pieces that show your creativity and mastery of the electroforming technique. So, put your skills to work, and let your imagination run wild as you continue to explore the world of electroforming jewelry-making!


If you want to see how to make these earrings, check out the video on YouTube.


Don't forget to subscribe to my channel for more electroforming tips and tutorials.

I wanna thank everyone who has read this blog and has shown an interest in electroforming. I hope that you have found it informative and helpful. Happy electroforming! CuForming!


Necessary Steps

How to Make Patina on Copper with Everyday Items

  Achieve Stunning Patinas on Copper with Everyday Items! Copper's natural beauty is undeniable, but a patina adds a whole new level of ...