I wanted to make this project for the end of summer, but it took me more than 45 days to complete it.
Different arts are involved here, sculpting with Apoxie, casting resin to make eyes and of course electroforming. It was challenging, but I finally manage to come to an end.
Did everything go right? No! It came out gorgeous? In my opinion, YES!
This is my octopus on a bottle. Please enjoy it.

Supplies needed:
- a bottle with cap
- Vinegar
- Sulfuric acid (this is not mandatory) http://ebay.to/37boFhw | https://amzn.to/3NKa4u
- Apoxie Sculpt https://ebay.to/3URwopj | https://amzn.to/36N1TfF
- Modelling tools https://ebay.to/3srynEG | https://amzn.to/3pksmrp
- Isopropyl Alcohol https://ebay.to/3fGkj6l | https://amzn.to/3C88qgK
- Electrical wire terminals https://ebay.to/3y9ZWEE | https://amzn.to/3SVL2dq
- Aluminum foil https://amzn.to/3M2bW0U
- Epoxy clear resin https://ebay.to/3e0anDY | https://amzn.to/3EccW0w
- Clear cups https://ebay.to/3rtsYLP | https://amzn.to/3SE7kAG
- Scale https://ebay.to/3C3tchF | https://amzn.to/3rrfzny
- Lens mold https://ebay.to/3RyVFSf | https://amzn.to/3V1kWHO
- Liquid latex https://ebay.to/3IZ5iGe | https://amzn.to/3Jcwu3
- UV Resin https://ebay.to/3JPvi79 | https://amzn.to/34bTMrS
- UV Lamp https://ebay.to/3t6D3yR | https://amzn.to/3Gms4pt
- CA Glue https://ebay.to/3pfSgfL | https://amzn.to/3gkYJ49
- Mirror effect varnish https://ebay.to/3hoYxRR | https://amzn.to/36Jwxq5
- Conductive Paint https://ebay.to/3CtqeVc | https://amzn.to/3okY7QA
- Brush https://ebay.to/3EfoYpJ | https://amzn.to/3unK1BC
- Copper Wire (0.6 mm or very thin) https://ebay.to/3Iifrxj | https://amzn.to/3ujk7PD
- Liver of Sulfur https://ebay.to/3BOoR1i | https://amzn.to/3Gt7p34
- Rotary Tool https://ebay.to/3M3Ujxb | https://amzn.to/3so0LHy
- Scotch Brite Brush https://ebay.to/3y9Q9hR | https://amzn.to/3M6fSxF
- Bristle Brush Wheel https://ebay.to/3hooJMu | https://amzn.to/3pnlhX4
- All the electroforming supplies https://kit.co/cuforming/electroforming-advanced-kit
Let's start with the things that need time.
I found a bottle with a painted label, so it needs to be cleaned. This kind of paint only goes off with acid. In a jar big enough to accommodate the bottle in it, I poured some Vinegar and a little sulfuric acid.

Then, I filled up the bottle with water to make it sink in the acid. I left it for three days to soften the paint and with paper towel I wiped the paint off the bottle quite easily.


Any kind of acid is gonna work here, just vinegar is fine and safe, but it needs time though. I've added sulfuric acid to accelerate the process, and because it's something I usually have in my lab.
Another thing that needs time to be completed is epoxy resin. Before starting mixing the resin, I like to clean my molds with latex. By applying a thin layer of liquid latex on top of any silicon mold, all the dust and small particles deposited on will be incorporated in the latex and when dry, they can be removed from the mold.

It takes a few hours for the latex to be cured, and we can begin mixing the resin.

I have this resin that is 1 to 1 ratio between A and B parts, so with a scale I weighted the same amount of each. Mix for 60 seconds and then pour. After 48 hours, the lenses are good to be removed from the mold.

In the meantime, I made the eye design on photoshop and paint the ones I needed with a wash of acrylic paint. I could have got them out of the printer already colored, but painting them was funnier.

Once all the parts were ready, I glued the paper on the bottom of the lenses with UV resin and left them to cure for 10 minutes under UV light.


Let's now start working on the bottle by applying a coat of Mirror effect varnish. This will create a cover on the glass to hide all the different colors of the stuff that we are going to put on top of it. Black for the conductive paint or white for the Apoxie (at the end of this project you will see that it didn't matter much because I covered almost everything).

I then applied a coat of very thick conductive paint that I'm experimenting with, and I don't know yet how it's going to work. I covered part of the bottle and let it dry.

It's now time for the fun part of this project: Sculpting. To do this, I use Apoxie Sculpt. It comes in 2 parts, A and B. While mixing this compound, always remember to put gloves on. It could be dangerous for your skin. Once mixed, it's safe to touch.
Start by making tentacles. With hands, make a conical shape, long and thin as you wish. To make the suckers, I made small balls. I put them in size order and with balled tools also of different sizes I made the suction cup shape.

I arranged eight tentacles on the bottle, trying to be natural and organic as possible to resemble the movement of the octopus.

With electrical wire terminals, I made a texturing tool. These are good to create a dotted texture.


I have a lot of these little things of any size in my shop, since we are all electricians in my family. But I discovered that lots of artists that work with polymer clay and such materials use them for their projects.
Then I covered all extremities with a round and flat piece of apoxie to make the skirt of the octopus. I shaped it with a silicon brush and textured it. I also removed all gaps of the skirt on the tentacles with another silicon brush.

The head is gonna be big and to save on apoxie I used some aluminum foil to make most of it's mass.
Then I cover it with apoxie and attach it on the body.

With a balled tool, I made the housing for the eyes and attach them to the head.
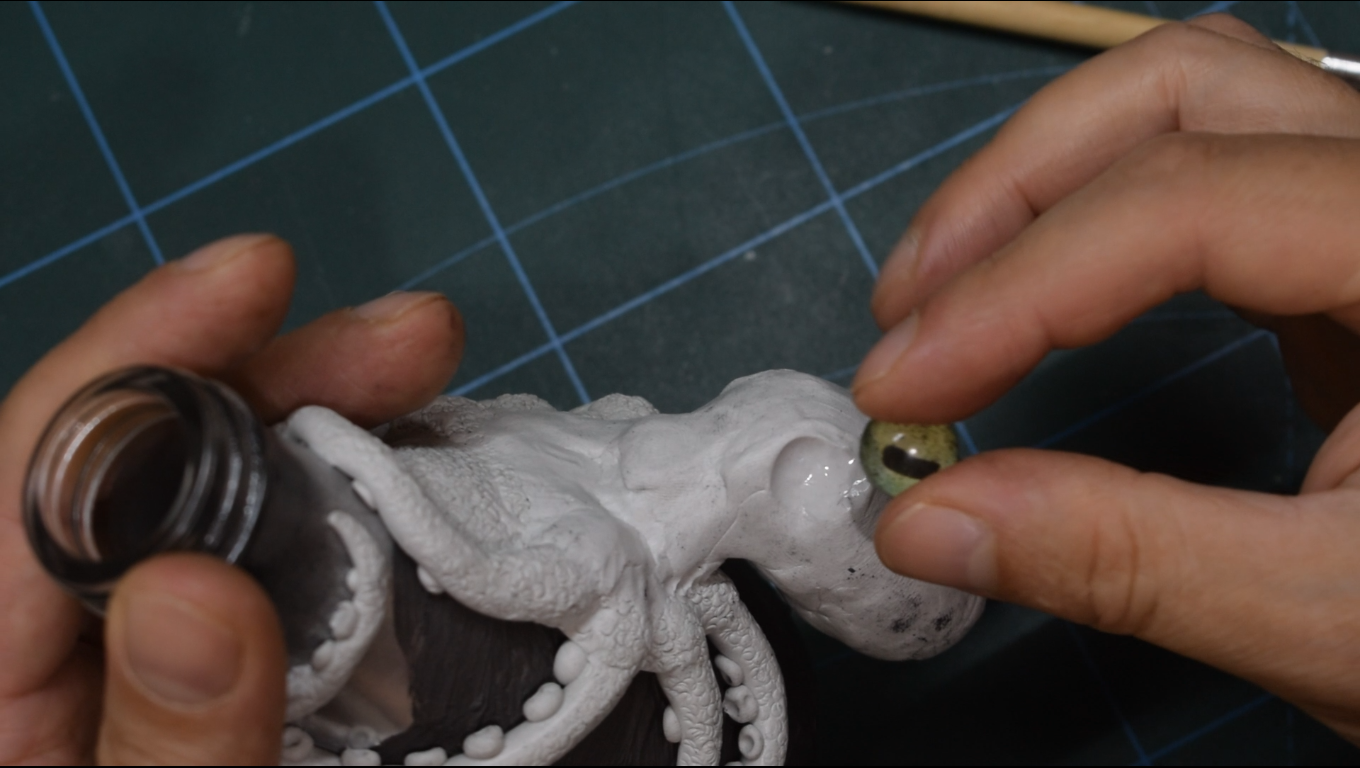
I used small pieces of apoxie to make eyelids and to avoid the stickiness of the apoxie, I dipped the silicon tools in isopropyl alcohol. Water can also be used to do this, but it's not very good, and there is on the market a solvent specific for this purpose. For me, Isopropyl alcohol is the best solution between quality and price.

Texturing everything it'll be the last thing to do before leave it to fully cure.
I then prepare the cap by removing some part of it and sand it a little with my belt sander. Glue the bigger eye with CA glue and do the same job with apoxie. A little tentacle on the side was the final touch.


Before the apoxie cure, it's a good behavior to clean the eyes from all the sticky residue of the apoxie. Isopropyl alcohol or acetone can do the job. I used a soaked cue tip.

Time to cover everything with conductive paint. I used a big brush for most of the surface and a smaller brush for the areas near the eyes and the tentacles near the glass.


Once dry, I used a scotch brite brush to make it smoother and give it a second coat of conductive paint (sorry, I didn't mention the second coat on the video).


With a 0.6 mm copper wire, I wrapped my pieces to make them ready to be hanged in the electroforming solution.

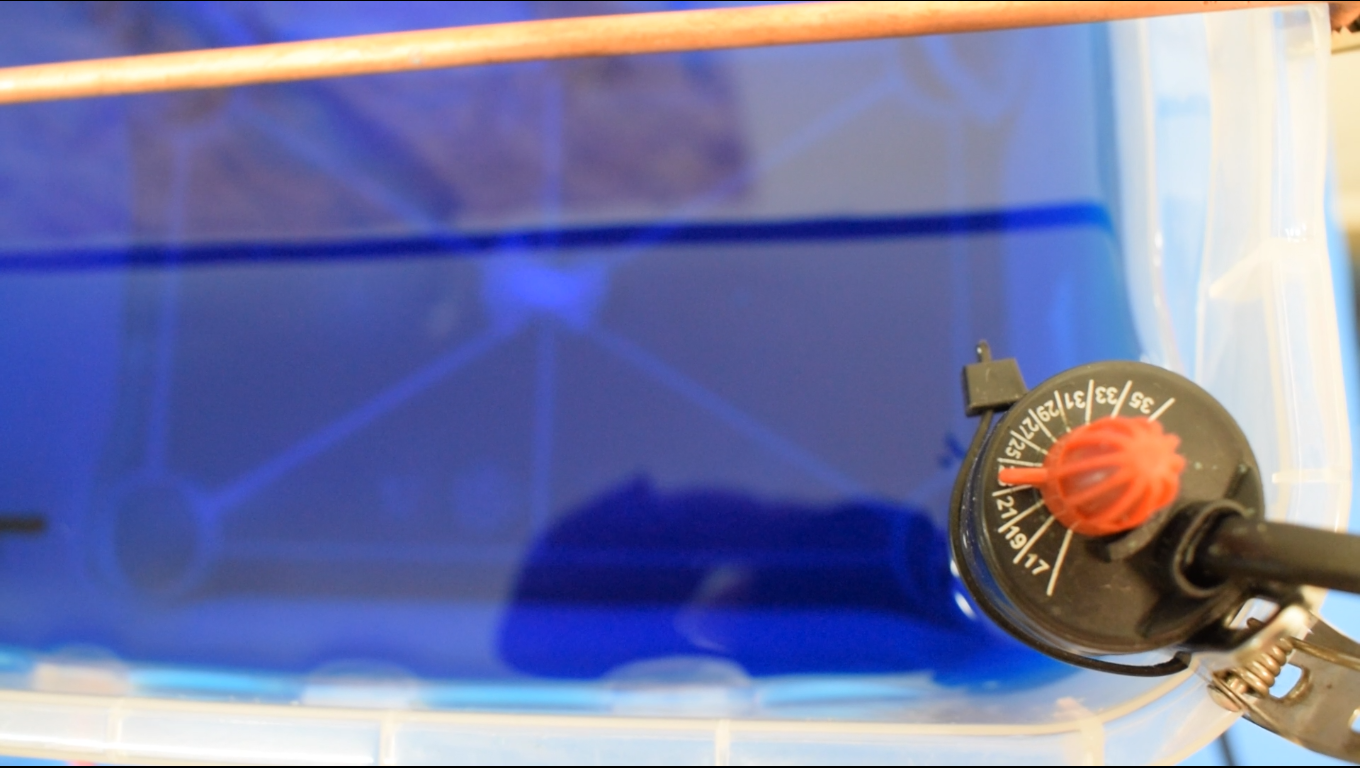
I dipped them in to the solution and regulate the power supply to the lowest current possible.

My calculation for the surface was 50 inches squares in total. So I started with 0.3 amperes. Once the pieces were covered in copper, I've regulated my power supply from 0.5 A to 1.5 A. The last 10 hours I left it at 1.25 A. (sorry again, this is not shown on the video).

I kept the cap in the bath for 41 hours, and the bottle for 55 hours.


What went wrong? This project was large for my small tank and I miscalculated the amount of anode. At the end, my pipes were almost vanished. And I didn't see it under the anode bags. This caused the brightener to looks like faded (but there was more than enough in the solution). The unbalance though didn't prevent the copper to coat the piece, it just didn't make it bright and shine.
.JPG)
Another issue was caused by the concave spots. Even almost at the end, they were black.
This is a graphite issue. Graphite is not conductive like copper itself, it creates electrical resistance. The solution for this problem is to use Copper Conductive Paint for deep and concave spots.


Now, to finish the piece, I oxidize it to make it black. In a plastic container, I poured some water and Liver of sulfur.

Liver of sulfur is the chemical substance used to color copper and silver. It has an intense smell produced by the evaporation of the sulfides, just like rotten eggs. It's recommended to use a respirator mask or work in a ventilated area.
Also, after we are done with our job, we need to neutralize it with baking soda or better with bleach. You can also leave it to evaporate before flushing in the drain. It's a toxic substance, we don't want to contribute to pollution.

After a few hours, everything was ready to be polished.
For this process, I like to use bristle brush wheels. To reveal the copper underneath the oxide, I use a 220 grit brush. To make the black oxide shine, I use a 2000 grit brush.


Last step is to clean everything. With a solvent, I removed the visible remains of the Mirror varnish and also remove the dust from the previous polishing process.

Step by step


.JPG)


Please check the video on YouTube and don't forget to subscribe.
Thank you all by CuForming!!!