Mastering the Art of Metal Patinas: A Step-by-Step Guide to Crafting Solid Liver of Sulfur

Metalwork enthusiasts, gather around! Today, we're diving into the captivating realm of solid liver of sulfur, the secret sauce behind those stunning and enduring patinas that elevate your creations. Buckle up as we take you through a step-by-step journey on how to create your own solid liver of sulfur – a game-changer in the world of metal crafting.
Ingredients and Tools:
Before we embark on this adventure, let's gather the essentials:
- Electric stove https://amzn.to/47QxDdJ | https://ebay.to/497yJ5D
- Small beaker https://amzn.to/3UjL9n3 | https://ebay.to/48OK1vW
- Distilled water (40 ml) https://amzn.to/3Uel4W9 | https://ebay.to/3SxdsNt
- Sodium hydroxide (40 grams) https://amzn.to/3Hyj1Vx | https://ebay.to/3HwfwyL
- Sulfur (16 grams) https://amzn.to/48Hp0TQ | https://ebay.to/3ugYodg
- Glass stirring rod https://amzn.to/3OfRCLM | https://ebay.to/42idCKq
- Silicon mold https://amzn.to/3SulMNW | https://ebay.to/3SuntuM
- Gloves https://amzn.to/42dQEWb | https://ebay.to/41WqJRW
- Dust mask https://amzn.to/47N87G3 | https://ebay.to/3AJtJoy
- Fume extractor or an outdoor setup
- Aluminum foil to cover your workspace
- Vacuum Pump https://amzn.to/4baumbJ | https://ebay.to/3SvPxh7


Step 1: Setting the Stage
Safety first! Wear gloves and a dust mask, and set up your workspace under a fume extractor or in a well-ventilated outdoor area. Cover your workspace with aluminum foil – this process can get a bit messy.


Step 2: Dissolving Sodium Hydroxide
Place the small beaker with 40 ml of distilled water on the electric stove. Carefully add 40 grams of sodium hydroxide and dissolve it. Take extra caution – sodium hydroxide is potent!

Step 3: Introducing Sulfur
Once the sodium hydroxide is dissolved, bring the solution to a boil. Add 16 grams of sulfur, and observe the magic unfold as the solution turns yellow. This signals the reaction, with sodium hydroxide and sulfur transforming into sodium sulfide.

Step 4: Stirring to Perfection
Keep stirring until the liquid transforms into a reddish-brown color. This process typically takes around 20 minutes. The appearance of solid parts indicates progress.


Step 5: Molding the Magic
As the volume reduces to around 40 ml, turn off the heat. Pour the hot liquid into a silicon mold and let it cool, witnessing the transformation from liquid to solid.


Step 6: Optional Drying
After the solid liver of sulfur cools and get hard, consider further drying for complete moisture removal. Using a vacuum pump is optional but ensures a completely dry final product.


Step 7: Create with the Power of chemistry
Once solid, put your creation to its final use. It can work on various metals like Copper or Silver – from creating vibrant rainbow patinas to achieving a sleek black finish.

Here's what you need:
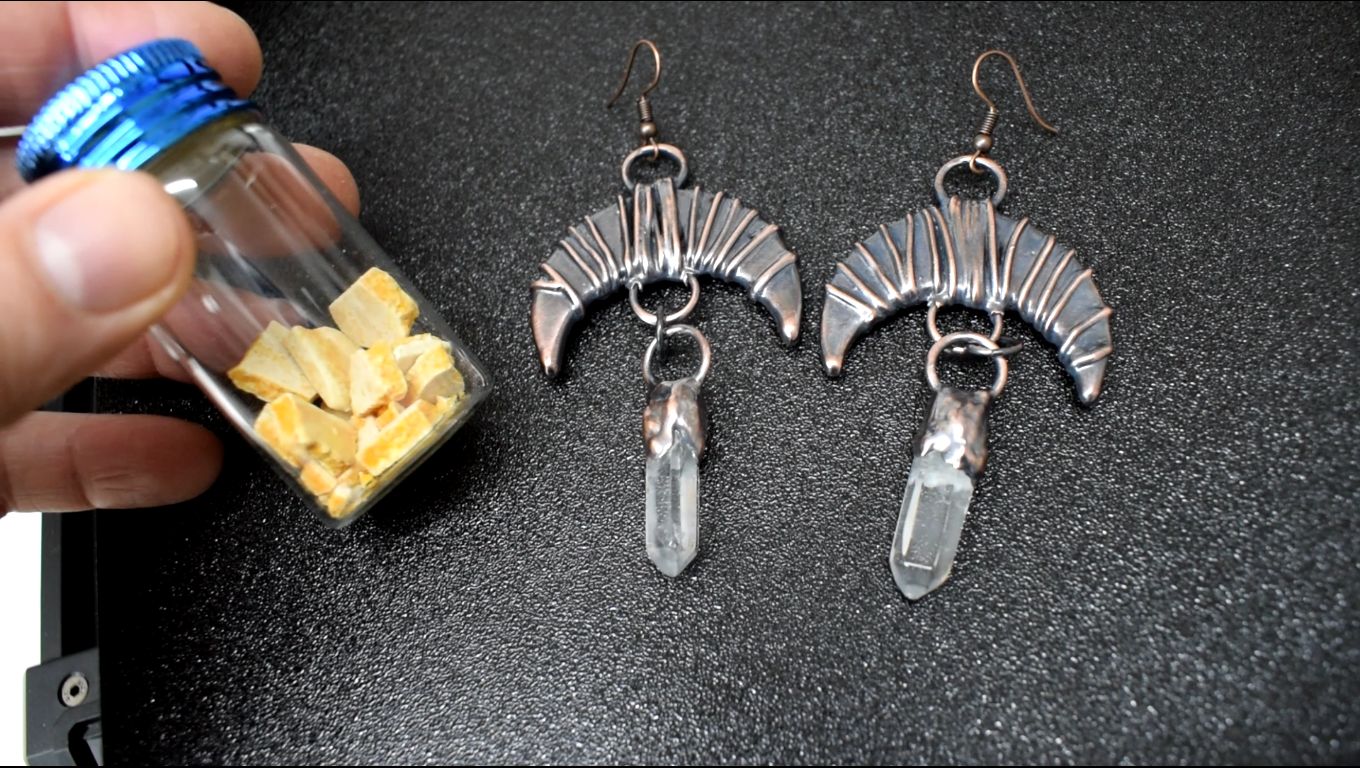
- A chunk of solid liver of sulfur
- Metal jewelry pieces (e.g., earrings)
- Warm water
Instructions:
Prepare a Warm Bath:
- Fill a container with warm water. The warmth of the water will dissolve the liver of sulfur faster and expedite the patina process.

Dissolve the Liver of Sulfur:
- Take a small chunk of your solid liver of sulfur. Dissolve it in the warm water. The amount will depend on the size and quantity of the jewelry pieces you want to patinate. Start with a small amount, as a little goes a long way.
Immerse Your Jewelry:
- Gently place your metal jewelry pieces into the dissolved liver of sulfur solution. Ensure that each piece is fully submerged.
Observe the Transformation:
- Watch as the patina begins to form. Liver of sulfur reacts with the metal, creating beautiful and unique color variations. The duration of immersion will influence the intensity of the patina, from rainbow to black, so keep an eye on the process.

Adjust as Needed:
- If you desire a darker patina, leave the jewelry in the solution for a longer duration. For a lighter patina, reduce the immersion time. Feel free to experiment to achieve the perfect shade for your artistic vision.

Remove and Rinse:
- Once you're satisfied with the patina, carefully remove the jewelry from the solution. Rinse them thoroughly under running water to halt the chemical reaction and wash away any residual liver of sulfur.
Let Them Shine:
- Allow the patinated jewelry to air-dry and, to revel the unique character of the metal underneath, polish the patina away with a steel wool scouring pad to admire the stunning transformation that each piece now possesses.


Step 8: Storing Your Product
Solid liver of sulfur is moisture-sensitive, so store it in a sealed container to prevent it from becoming wet. Consider using a vacuum pump for added protection.
Congratulations! You've just crafted your own solid liver of sulfur, ready to breathe life into your metalwork. Remember, patience is key, and the results are undoubtedly worth the effort. Share your experiences and creations with the community, and let's keep the metal crafting magic alive!
Don't forget to watch the related video on YouTube for a visual experience. Leave a like and consider subscribe to my channel for more of these adventures.
Thanks to all of you. CuForming.
✨🔨 #MetalCrafting #LiverOfSulfur #DIYArtistry
Comments
Post a Comment