Welcome to the fascinating world of electropatina. This technique allows you to transform plain copper into captivating pieces of art with stunning colors and unique patterns. Join me as we explore the step-by-step process, discuss the creative possibilities, and uncover the secrets behind achieving breathtaking results.

Electropatina: Unleashing the Magic of Color on Copper

If you're looking to add a touch of enchantment to your copper creations, electropatina is the perfect technique to explore. With its ability to transform plain copper into vibrant, multicolored works of art, electropatina offers a world of creative possibilities. In this post, I will take you through the step-by-step process, discuss the necessary equipment, highlight important safety precautions, and explore various techniques to help you master the art of electropatina.

Equipment: To successfully carry out the electropatina process, you will need a few essential pieces of equipment:
- The recipe to make the solution is here: https://beacons.ai/cuforming
- Beaker: Used for containing and heating the electropatina solution.
https://amzn.to/3ocfdTG https://ebay.to/3W9uDov
- Thermometer: To monitor the temperature while operating.
https://amzn.to/3MzDaOg https://ebay.to/3Ij0X2w
- Copper Electrode: Serves as the anode in the process setup.
https://amzn.to/3oV1Jf2 https://bit.ly/3AMAUg0
- Power Supply: Provides the electrical current required for the reaction.
https://amzn.to/3WrpwQJ https://ebay.to/3Lo7Dgo
- Electric stove: With this you can warm the solution.
https://amzn.to/3VfGtNe https://ebay.to/41Wt3bC
- Clips: Used to connect the anode and cathode to the power supply.
https://amzn.to/3LgFmse https://ebay.to/3NtPIaG
- Safety Gear: Wear gloves, eye protection, a respirator mask, and a lab coat to ensure your safety throughout the process. Work under a fume extractor or a kitchen hood or in a ventilated area.


Step-by-Step Process:
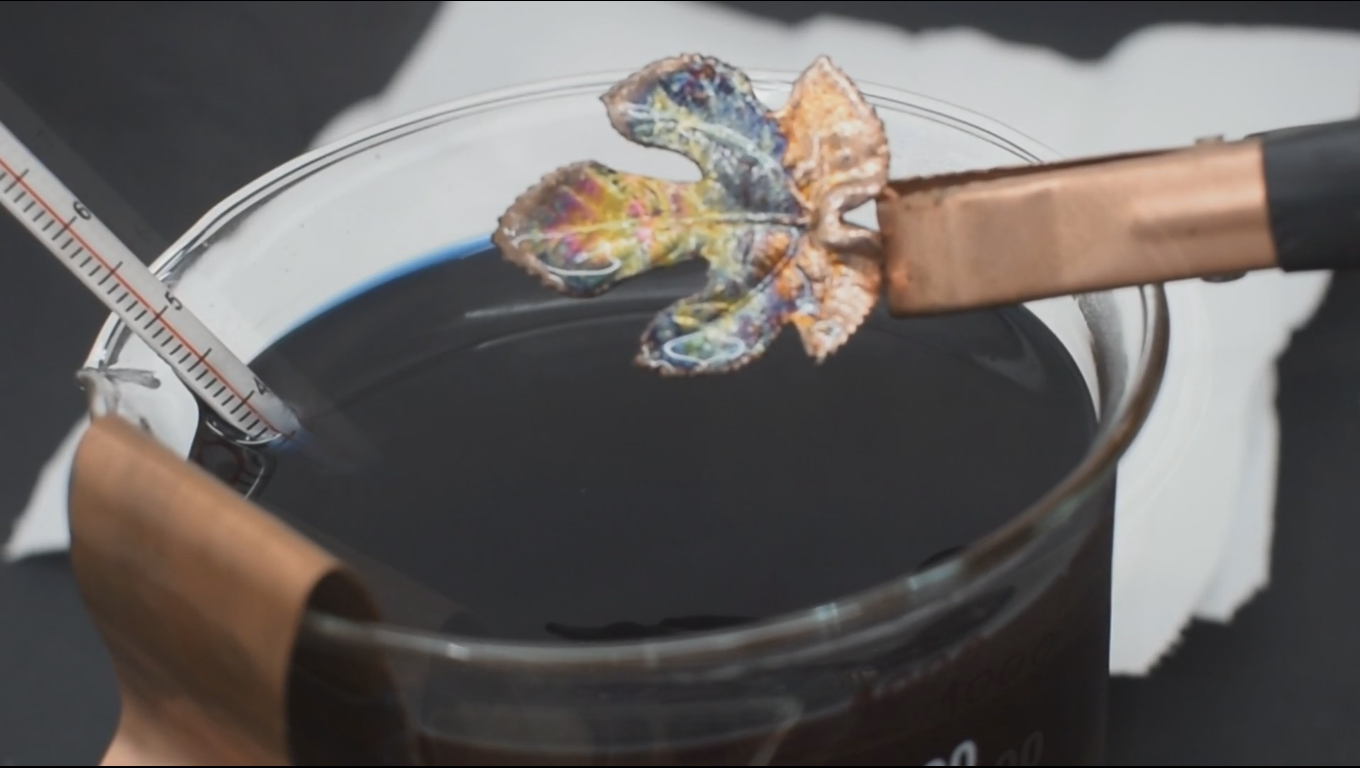
Setting up the process: Warm the solution to a range of temperature between 65 °C and 90 °C, Place a copper electrode (anode) in the solution, ensuring it doesn't touch the cathode (the piece you want to color) while operating. Connect the anode to the positive pole of a power supply and the cathode to the negative pole.

Applying the Current: Turn on the power supply, setting it to the recommended voltage (typically around 1.5 volts or lower) and maximum amperes. This creates the electrical current necessary for the reaction to occur.


Dipping the Piece: Slowly immerse the cathode into the solution, ensuring it is fully submerged. The length of time you leave it in the solution will determine the depth and intensity of the patina color.


Safety Precautions: Electropatina involves working with chemicals and electricity, so it's crucial to prioritize safety. Here are some essential precautions to follow:
- Wear appropriate safety gear to protect your hands, eyes, and respiratory system.
- Work in a well-ventilated area or use a fume extractor to minimize exposure to fumes.
- Handle the chemicals with care, following proper storage and disposal guidelines.
- Avoid direct contact with the electropatina solution and ensure the power supply is turned off when not in use.
Techniques: There are different techniques you can experiment with to achieve various effects and colors:


- Gradient Technique: With a low range of voltage (0.5V), dip the piece in the solution for long intervals, slowly moving it up and down. This technique creates a gradient effect with a smooth transition of colors.
- Splash Technique: With a high range of voltage (1.5V) dip the piece in the solution for a short time and remove it with fast, abrupt movements. This technique produces a more textured and unpredictable pattern on the surface.
- Removing and Rinsing: Carefully lift the cathode out of the solution, making sure it doesn't touch the anode. Rinse the piece thoroughly with water to wash the excess of solution.
- Cancel the patina by raising the voltage (5.0V) quickly dip and remove the piece from the solution just once to make the piece ready for a new patination.

Unlocking the Beauty of Electropatina: With its ability to turn copper into a canvas for stunning colors, electropatina opens up a world of creative possibilities. Whether you're designing jewelry, sculpting decorative items, or exploring mixed-media art, the vibrant patinas achieved through this process add depth, character, and intrigue to your creations.

Remember, practice and experimentation are key to mastering the art of electropatina. Each piece you create
But that's not all! As a token of our appreciation for your support, I'm thrilled to announce the giveaway in conjunction with our YouTube video. By participating, you have a chance to win all the exclusive contents about electropatina. To qualify to receive the giveaway leave a comment in the YouTube video saying "I Love Copper".
The complete Video with exclusive content of how to create your own electropatina and the eBook will provide a comprehensive resource with detailed recipes, tips, and additional insights into achieving the desired results in your own electropatina projects. Be sure to leave your comment and unlock the full potential of this incredible technique.
The world of electropatina offers a captivating journey into the art of transforming copper into vibrant and enchanting masterpieces. Whether you're a jewelry enthusiast, a DIY enthusiast, or simply intrigued by the allure of unique patinas, electropatina allows you to unleash your creativity and create one-of-a-kind pieces that mesmerize and inspire. Don't miss out on the exciting giveaway and be sure to grab your copy of the eBook to continue exploring the endless possibilities of electropatina. Let's embark on this artistic adventure together and witness the magic of color come to life on copper.
Thank you, CuForming!
This comment has been removed by the author.
ReplyDelete