Halloween is coming. It's the holiday that scares kids and makes them happy. Also, adults got happy and scared by lots of things, various kind of monsters wandering around, creepy dead things, bats, owls and spiders... well some people are scared of spiders no matter what day is.
My idea is simple: a spider that is scary and a pumpkin that bring everybody the spirit of Halloween, in an object that is seen everywhere during these days.
Here my Spider Candleholder for Halloween shaped like a Pumpkin!
Supplies:
- Copper Wire: https://amzn.to/3LwdFtM | https://ebay.to/3Iifrxj
- Wrap n tap pliers https://amzn.to/3DxT9YM | https://ebay.to/3N4yMFJ
- Flat nose pliers https://amzn.to/3TMCKoy | https://ebay.to/36yXkVZ
- Nippers: https://amzn.to/38p5eST | https://ebay.to/3BQzX62
- Wooden mandrel https://amzn.to/3DtF8Lv | https://ebay.to/340N0Fy
- Butane torch https://amzn.to/3TDooXI | https://ebay.to/33TeRqZ
- Copper braising alloy https://amzn.to/3Du6Tng | https://ebay.to/3DxjRk3
- Tweezers: https://amzn.to/3tgwY2S | https://ebay.to/35aY2IZ
- Pickling solution https://amzn.to/3FfgteY | https://ebay.to/3SzVRRx
- Aluminum foil https://amzn.to/3M2bW0U
- Apoxie Sculpt https://ebay.to/3URwopj | https://amzn.to/36N1TfF
- Modelling tools https://ebay.to/3srynEG | https://amzn.to/3pksmrp
- Isopropyl Alcohol https://ebay.to/3fGkj6l | https://amzn.to/3C88qgK
- Rolling pin https://ebay.to/3gJLT32 | https://amzn.to/3zb5DCL
- Conductive Paint https://ebay.to/3CtqeVc | https://amzn.to/3okY7QA
- All the electroforming supplies https://kit.co/cuforming/electroforming-advanced-kit
- Liver of sulfur: https://amzn.to/3Gt7p34 | https://ebay.to/3BOoR1i
- Zapon Lack: https://ebay.to/35BMb6z
- Respirator mask: https://amzn.to/3JTS1yI | https://ebay.to/3sn6fCv
- Rotary Tool https://ebay.to/3M3Ujxb | https://amzn.to/3so0LHy
- Scotch Brite Brush https://ebay.to/3y9Q9hR | https://amzn.to/3M6fSxF
- Bristle Brush Wheel https://ebay.to/3hooJMu | https://amzn.to/3pnlhX4
- A Candle
Every standing up project begins from the base.
So I start from the very bottom by making the feet with my wrap 'n tap pliers. I bent the extremity of the copper wire to make a loop. Then I measured 2 cm going up and, with my flat nose pliers, I bent the first angle. After 2 more cm, a second one and, after 3 cm I cut off the pieces with my nippers.

I repeat the process 8 times because spiders have 8 legs.
With the same wire I make a circle. To make it perfectly round, I help myself with a wooden mandrel.
Then I placed everything on my refractory base to put all the pieces together. I use a braising alloy and a butane torch for the job and I start by braising the circle and one by one all the 8 legs. To keep the legs standing in place, I used reverse tweezers.


I wasn't sure about the stability of the structure while testing it with the candle, so I made a cross shape to reinforce the bottom of the cup that is going to contain the candle.

After everything was completely welded together, I put it in pickling solution for 20 minutes to remove all the burning scales and clean it.

Before I start use the Apoxie resin for the body, I cover then the bottom of the cup with aluminum foil.

I mixed the Apoxie, always with gloves, and with my steel rolling pin I made a sheet of resin. I applied the first layer, cut the excess and let it cure for a few hours. Once it's hard, it's easier to work with the other layers of resin that I will go to apply.
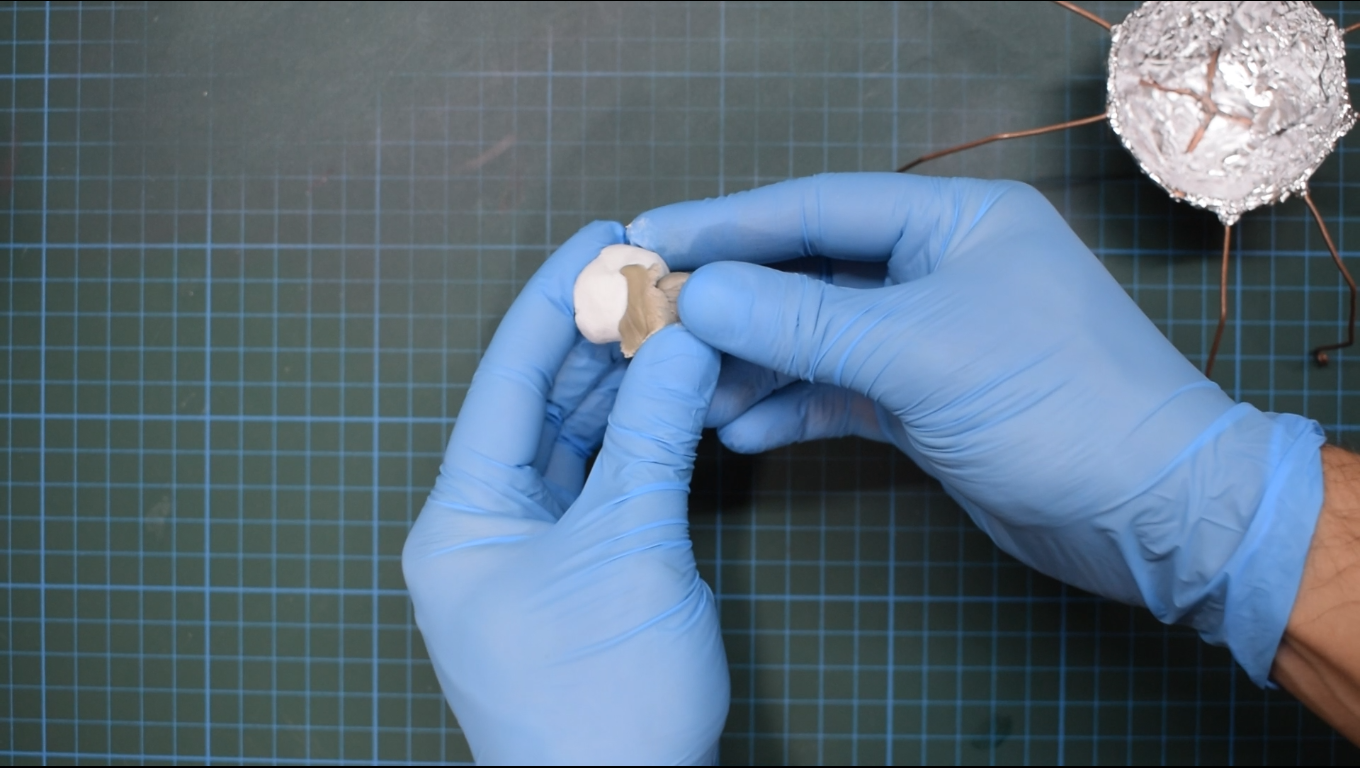
I then put a sheet inside and start working all the hedges with soft apoxie. I filled all the holes and smooth everything that needed to be done. Also, I use Isopropyl alcohol to work with Apoxie because it's super sticky. I dip my silicone brush of my fingers to make a better job. It's like working with natural clay.


I add the last sheet of resin on the bottom of the cup to make the design. With a metal rod, I made straight intersecting lines to make it look like a pumpkin and with a with aluminum foil I made the blossom end. To finish it, I made a few wrinkles here and there, and I smooth everything with my finger and isopropyl alcohol.


I left it to cure completely for a day and gave it 2 coats of conductive paint.

When the paint was dry, I dipped it in the electroforming tank. I wished I had my bigger tank set up because with the small one it was difficult to let it inside at first, but after a few attempts I manage to make it fit precisely.

After 27 hours and some adjustment on the Power supply, it was finally ready.

I then set it in a plastic container with water and with lots of liver of sulfur to make a black patina.

Liver of sulfur is the chemical substance used to color copper and silver. It has
an intense smell produced by the evaporation of the sulfides, just like
rotten eggs. It's recommended to use a respirator mask or work in a
ventilated area.
Also, after we are done with our job, we need to neutralize it with baking soda or
better with bleach. You can also leave it to evaporate before flushing
in the drain. It's a toxic substance, we don't want to contribute to
pollution.
When ready, I start by polishing all the black with a scotch brite brush and my rotary tool. With a bristle brush wheel 1000 grit, I make it to be a little bit shinier. I'll keep my respiratory mask on and carry on with the work.


It didn't take long to make polish it all and have it ready for a photoshoot and finally light the candle.


Comments
Post a Comment