Here we are!
The first step to start Electroforming is to set up our laboratory with all the equipment we need.
All the tools and material can be adapted depending on your necessity. If it's a business or you just wanna make your own jewelry and have fun, you need to scale all the equipment to your needs.
The tank is the protagonist of this first post because inside the tank are gonna take place all the electrochemical processes, that will lead us to the creation of our objects.
Here all the tools and material I'm using to set up the tank:
- Tank. Can be any plastic or glass beaker (do not use any kind of metal).
- An adjustable power supply.
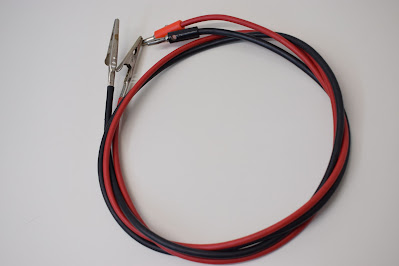
- Two wires with alligator clips.
- Magnetic stirrer.
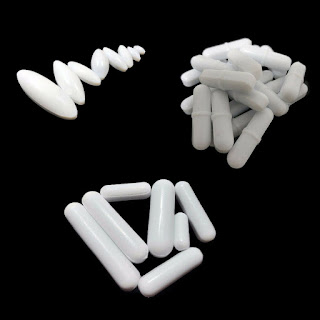
- Magnetic stir bars.
- One or more copper pieces for the anode pole. Any kind of pure copper is gonna be good, such as plumbing pipes, electrical wire, electrical grounding bars etc.
- Anode bag for filtering your anodes.
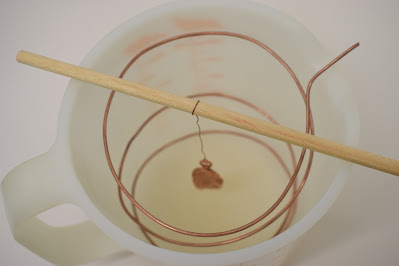
- A copper rod for the cathode pole. Or a wooden shaft for single objects.
- Fish tank heater.
- Thermometer for liquids (a fish tank one is the best).
- Electroforming Solution
I'm using a 10L plastic container. With 8 liters of solution.
Glass beakers are a good solution for small batches. A 10L beaker can be very expensive and for some uses really uncomfortable. It can also break any time for any reason.

Buy it on eBay #1 Buy it on eBay #2 Buy it on eBay #3
Buy a glass beaker on eBay from UK Buy a glass beaker on eBay from US
A 5 Amperes adjustable Power supply.
It is good for 1 to 12 liters of solution, and I can fit in 20 rings at once. For more liquid and pieces, the maximum current must be higher.
There are two methods to regulate the power supply. The first is by Amps. After dipping in the piece, you just set the amps between 0.01A and 0.1A for every inch square. That's not my favorite method.
In my personal experience, and based on the chemistry of the solution, the current will go up as the copper coat grow on the piece. Therefore, before I dip the piece in, I rather set the current all the way up and the voltage between 0.1V to 0.2V for every inch square. With this method, I can see the current grow to the value I want and stop it, or just regulate the speed of the process to reach my desired result.
*Going under range will cause a very long time for the object to get coated (worst-case scenario, it will never start the process). Going over range will “burn” your piece, it means that the coating will get super rough and black just like a burned piece of metal.

Buy it on eBay from UK 220V Buy it on eBay from US 110V
Copper electrical wires with alligator clips that I made my self with a 6 mm electrical wire.
These are DIY magnetic stirrers that I also made by my self.
Stirring the solution will help all the copper ions to be distributed homogeneously.

Lots of options can be found on the internet that you can buy. If you choose a glass beaker instead of plastic, you can buy a stirrer with the hot plate and avoid the fish tank heater.

Stir bars can be of different kind and length. You should choose the length based on the capacity of your tank.
For the anode pole, there are endless possibilities. I'm using plumbing pipes.


For a small rounded container, a simple copper wire spiral shaped is the best choice.
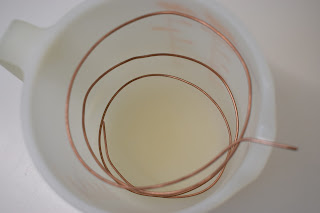
However, any pure copper bar is perfect for the job, the fatter it is, the longer it's gonna last.

Anode bags are time and trouble saver if you do lots of objects. They are good for filtration of small copper particles that are gonna come off of any anode bar. That's inevitable! Usually, when the bars are brand new there is no concern about this issue, but after they start to worn out, you will see a deposit of little pieces of copper on the bottom of your tank. If you use a stirrer, it's gonna be worst. They will travel everywhere in the liquid, and they will stick to all the pieces, forming lots of pointy spikes. Those are gonna be annoying, and jewelry can get stuck on clothes or even cause scratches on your skin.

Anode bags are a prerogative for smooth surfaces and for plating, and they can be very expensive.
If you do one piece at the time you can pour off the liquid and filter it with coffee filters that is gonna be very annoying.
A cheap alternative (very cheap) is dust cloth like Swiffer or basically any other brand.


For the cathode, I use copper rods.

A wooden shaft can also be use for single objects. The alligator clip can be plugged directly on the object.
A fish tank heater is used to keep the temperature on the correct range. All the documentations that I considered, report as the right range between 15 °C and 30 °C (59 °F to 86 °F).
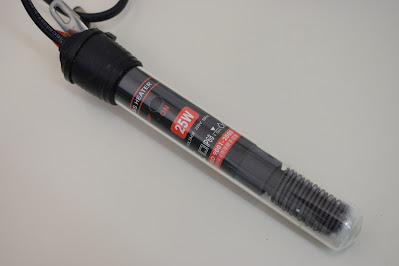
The temperature must be considered as an important factor for the texture of the copper coating. Lower temperature gives you a smoother coat and higher temperature gives you a rough coat.
Same as the current…. * Going under range will cause a very long time for the object to get coated (worst-case scenario, it will never start the process). Going over range will “burn” your piece, it means that the coating will get super rough and black just like a burned piece of metal.
My favorite range is between 19 °C to 27 °C.
A thermometer will be needed to measure the temperature. It must be a thermometer for liquids, but not any kind of thermometer for liquids is good. I'm using one for fish tanks because it's made out of glass. Those with metal probe and thermocouple can contaminate the liquid and even get dissolved by the acid in the solution. A plastic probe could be ok as long as the thermocouple is seal, so the liquid don't penetrate inside it.

Electroforming solution is the most significant material for the process. I'm not gonna talk about it in this post because it's a very long topic, and it requires a post just for itself.

There are lots and lots of variables in this process. Any value that is changed will make the difference on the final result. Sometimes it could give you an interesting effect and other times could be a mess.
On YouTube, there is a video related to this post. Please watch it and subscribe to my channel for more.
Thank you all! CuForming.
Comments
Post a Comment